Install the YS Desk Web Chat experience on your website using the installation snippet generated during onboarding.
This step provides the code and instructions required to add the customer-facing Web Chat widget to your website.
Generate Your Installation Code
If the Web Chat installation code has not yet been generated, select Generate code.
YS Desk generates the Web Chat installation snippet for the configured channel. After the code is generated, the installation script is displayed in the code panel.
The generated script contains the channel token required to initialize the Web Chat SDK.
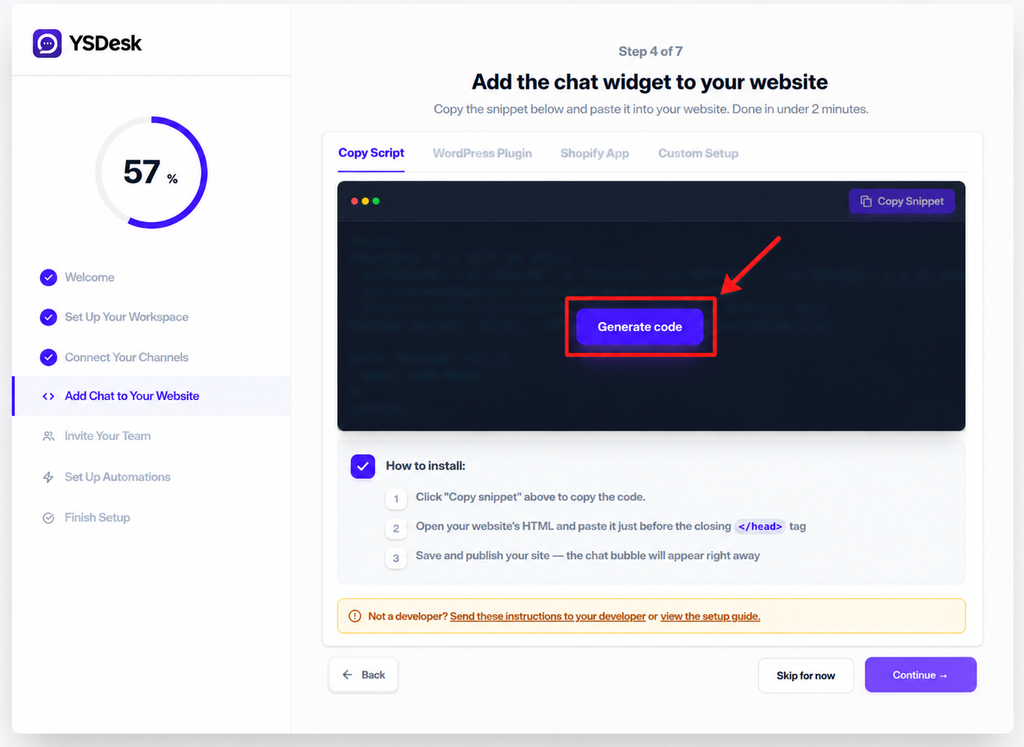
Figure ONB-04-02 — YS Desk onboarding Step 4 showing the generated Web Chat installation script with the Copy Snippet action.
Install Web Chat
The onboarding wizard provides the Web Chat installation interface and generates the script required to load the widget on your website.
The Step 4 screen includes a Copy Script tab for the direct script installation method. Additional installation options such as WordPress Plugin, Shopify App, and Custom Setup are displayed in the interface but are currently unavailable during onboarding.
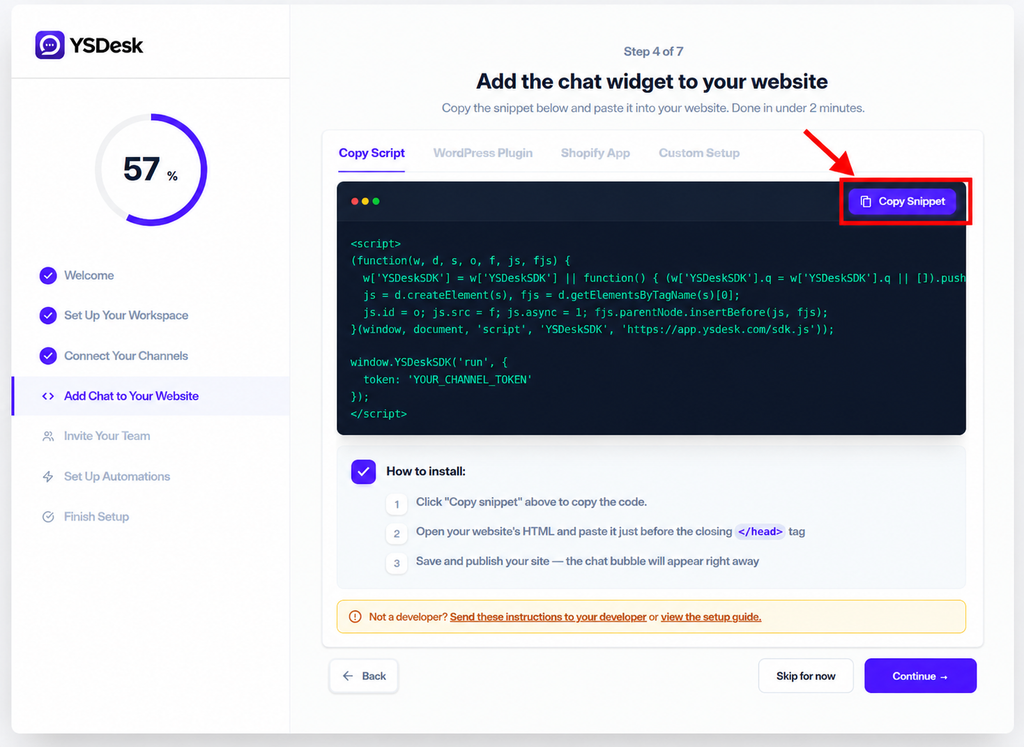
Figure ONB-04-01 — YS Desk onboarding Step 4 showing the Web Chat installation screen before the installation code is generated.
Installation Code
The onboarding wizard generates a script similar to the following:
<script>
(function(w, d, s, o, f, js, fjs) {
w[‘YSDeskSDK’] = w[‘YSDeskSDK’] || function() {
(w[‘YSDeskSDK’].q = w[‘YSDeskSDK’].q || []).push(arguments)
};
js = d.createElement(s), fjs = d.getElementsByTagName(s)[0];
js.id = o;
js.src = f;
js.async = 1;
fjs.parentNode.insertBefore(js, fjs);
}(window, document, ‘script’, ‘YSDeskSDK’, ‘https://app.ysdesk.com/sdk.js’));
window.YSDeskSDK(‘run’, {
token: ‘YOUR_CHANNEL_TOKEN’
});
</script>
Auto replaced YOUR_CHANNEL_TOKEN with the channel token generated by your YS Desk workspace.
Do not modify the SDK loader structure or replace the token with unrelated credentials.
Copy the Installation Code
Select Copy Snippet in the top-right corner of the code panel to copy the generated installation script.
After the script is copied, the button temporarily changes to Copied! as confirmation.
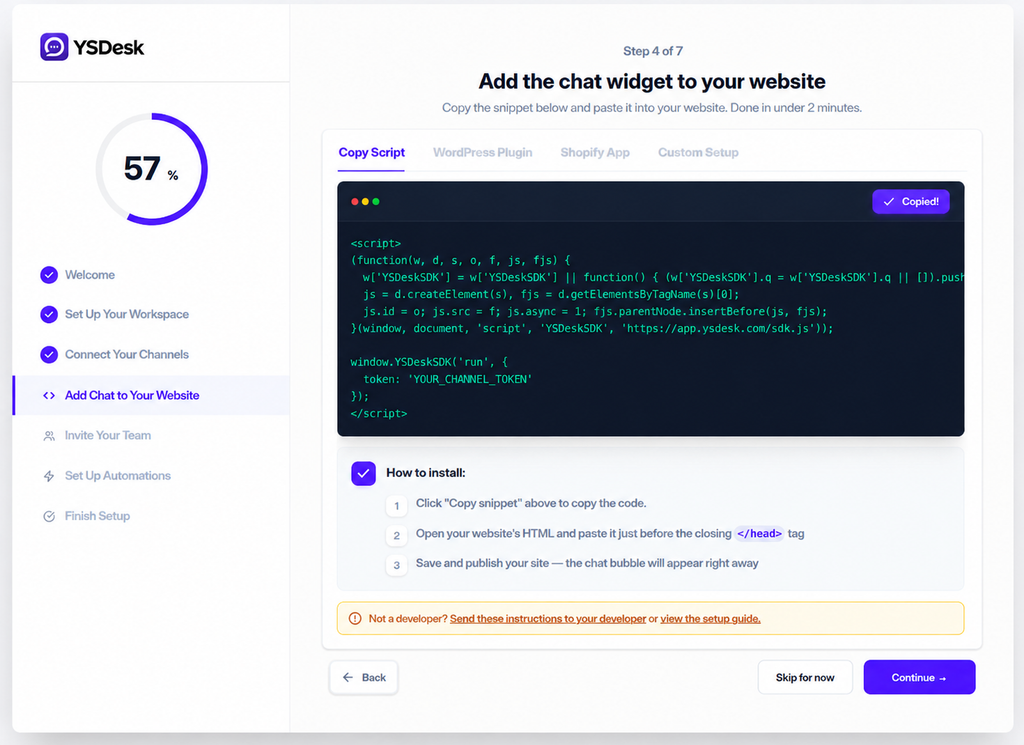
Figure ONB-04-03 — YS Desk onboarding Step 4 showing the installation script after it has been copied successfully.
Add the Code to Your Website
After copying the installation script, open the HTML of the website where you want to display Web Chat.
Paste the script immediately before the closing </head> tag.
For example:
<head>
<!– Existing website content –>
<!– YS Desk Web Chat SDK –>
<script>
…
</script>
</head>
Save and publish the website after adding the script.
The Web Chat launcher should appear on the published website according to the configured channel settings.
How to Install
- Select Copy Snippet to copy the installation code.
- Open your website’s HTML and paste the script immediately before the closing </head> tag.
- Save and publish your website.
Note: The current onboarding flow does not automatically crawl or inspect your external website to verify that the script has been installed. Verify the published website manually by opening it in a browser.
Continue to Team Member Invitation
After the installation code has been generated, select Continue → to proceed to Step 5 — Team Member Invitation.
You can also select Skip for now to continue without completing the installation at that time.
Expected Result
After completing this step:
- The Web Chat installation code is generated and available.
- The installation script can be copied from the onboarding wizard.
- The script is added to the website before the closing </head> tag.
- The website is published with the YS Desk Web Chat integration.
- The onboarding wizard can continue to Step 5 — Team Member Invitation.
Need Help?
Email: support@ysdesk.com
Documentation: https://docs.ysplugins.com/ys-desk