Add YS Desk Web Chat to a website or web application using the Web Chat SDK.
This quickstart covers the minimum steps required to configure a Web Chat channel, add the SDK to your application, open the widget, and verify that the integration is working.
For advanced configuration, visitor identity, SDK commands, and framework-specific integration, continue to [Web Chat].
Before You Start
Before installing Web Chat, make sure you have:
- A YS Desk workspace.
- A configured Web Channel.
- The channel token generated for that channel.
- Access to the website or web application where you want to install Web Chat.
The channel token is used by the SDK to initialize the configured channel. During initialization, the SDK verifies the channel configuration and establishes the visitor session required by the Web Chat experience.
Step 1 — Create or Select a Web Channel
In your YS Desk workspace, open the channel configuration and select the Web Channel.
Configure the Web Chat appearance and launcher settings as required, then save the channel configuration.
The Web Chat installation flow is:
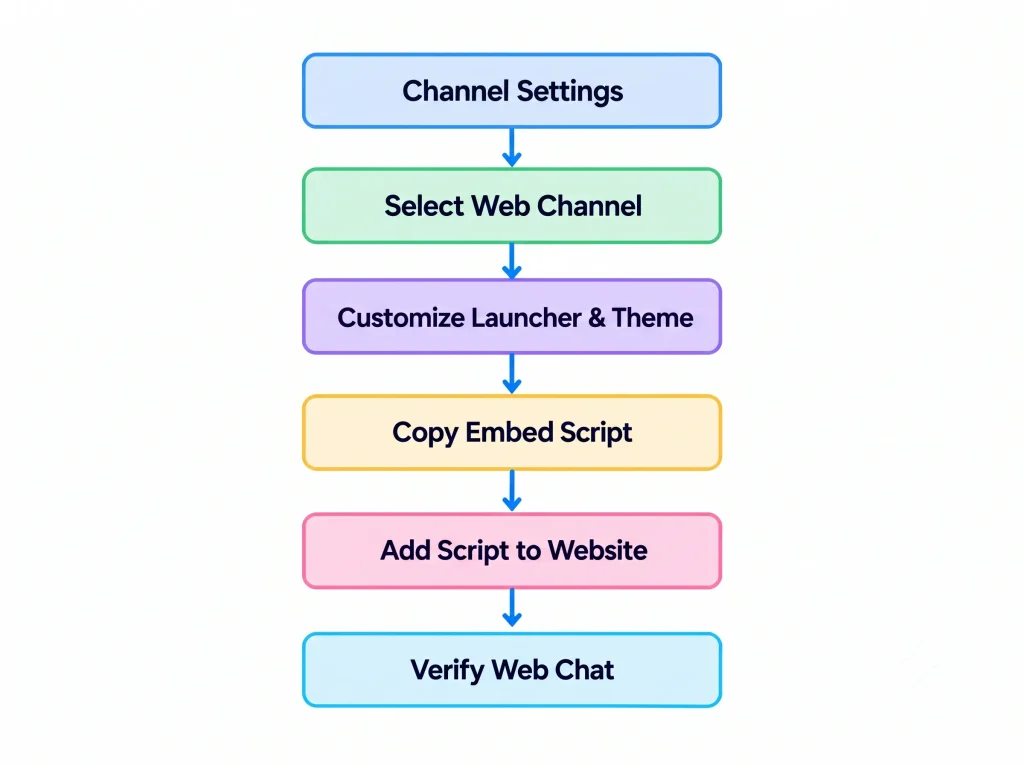
The current implementation supports configuring the launcher, theme, placement, and related Web Chat settings before the installation script is copied.
Step 2 — Get Your Channel Token
Copy the channel token provided by the Web Chat channel configuration.
Use the token only in the client-side configuration intended for the Web Chat SDK. Do not publish private server credentials or secrets in your website code.
The SDK configuration requires a token value representing the Web Chat channel.
For the example below, replace:
YOUR_CHANNEL_TOKEN
with the actual channel token from your YS Desk workspace.
Domain authorization
The website domain must be authorized for the Web Channel before the SDK can initialize successfully. During channel initialization, YS Desk validates the request origin or referrer against the domains configured for the workspace/channel. An unauthorized domain can cause initialization to fail with HTTP 409 (Invalid token or domain).
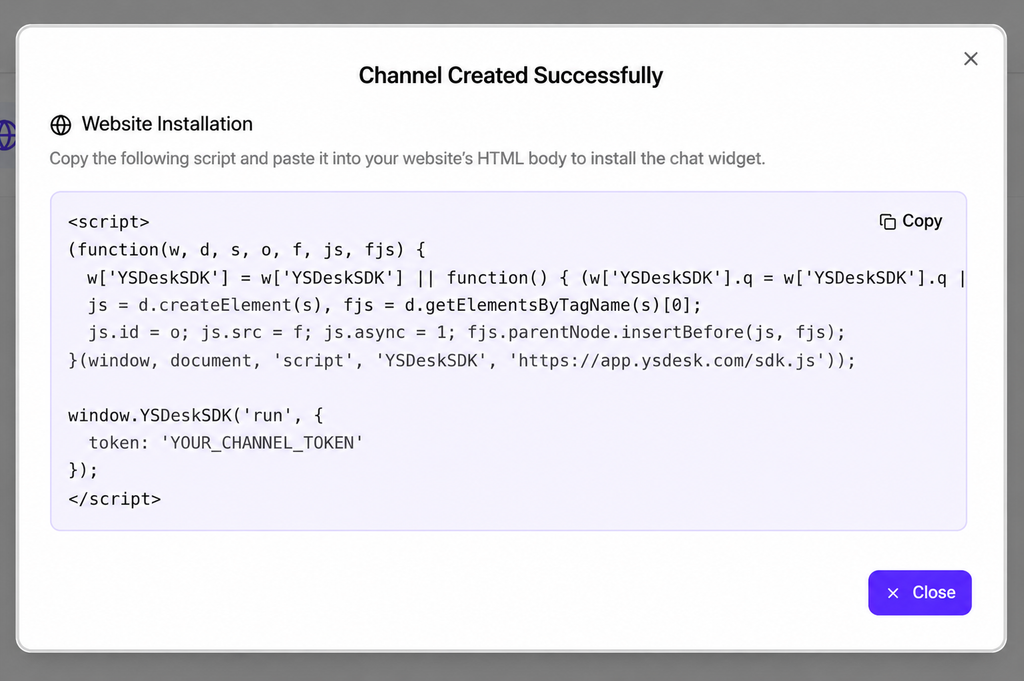
Figure QS-02 — YS Desk Web Chat installation dialog showing the website embed script and channel token placeholder.
Step 3 — Add the Web Chat SDK
HTML / JavaScript
Add the asynchronous SDK loader to your website.
<script>
(function(w, d, s, o, f, js, fjs) {
w[‘YSDeskSDK’] = w[‘YSDeskSDK’] || function() {
(w[‘YSDeskSDK’].q = w[‘YSDeskSDK’].q || []).push(arguments)
};
js = d.createElement(s), fjs = d.getElementsByTagName(s)[0];
js.id = o;
js.src = f;
js.async = 1;
fjs.parentNode.insertBefore(js, fjs);
}(window, document, ‘script’, ‘YSDeskSDK’, ‘https://app.ysdesk.com/sdk.js’));
window.YSDeskSDK(‘run’, {
token: ‘YOUR_CHANNEL_TOKEN’
});
</script>
The current SDK architecture uses an asynchronous script loader and initializes the SDK through the YS Desk client-side API.
Add the script to the page where you want the Web Chat launcher to be available.
React, Next.js, or Vite
For React, Next.js, and Vite applications, load the YS Desk sdk.js script from the application and call window.YSDeskSDK(‘run’, { token: ‘YOUR_CHANNEL_TOKEN’ }) after the client environment is available.
Step 4 — Open and Test Web Chat
Load the website after adding the SDK.
The Web Chat launcher should appear according to the configured channel settings.
Open the widget and send a test message.
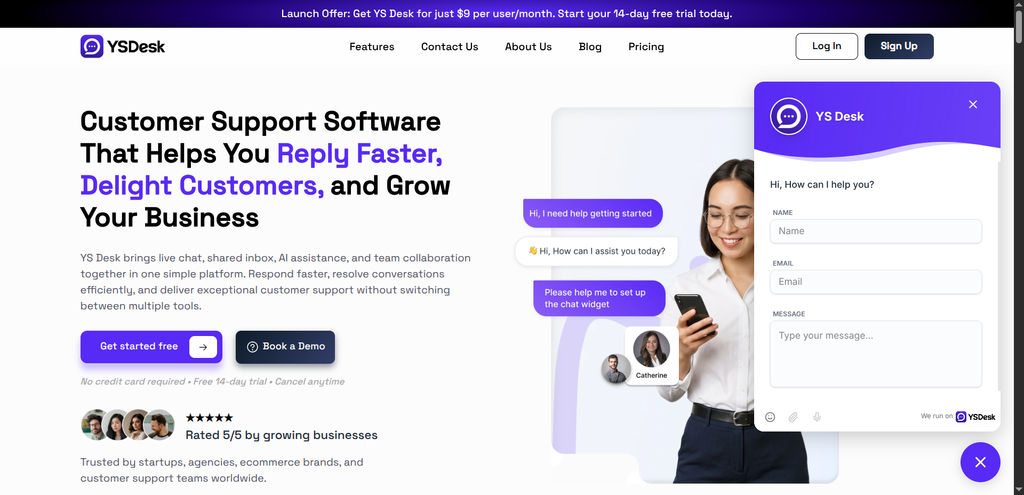
Figure QS-01 — YS Desk Web Chat running on a website with the customer-facing widget open and ready for conversation.
A successful integration should result in the visitor being connected to the configured YS Desk channel and the conversation becoming available to the support workspace.
The widget establishes the channel configuration and visitor session during initialization before creating or resuming the visitor conversation.
Quick Test
Use this test sequence:
1. Open the website.
2. Confirm the Web Chat launcher is visible.
3. Open Web Chat.
4. Send a test message.
5. Open the YS Desk Workspace.
6. Confirm the conversation appears.
7. Reply from the workspace.
8. Confirm the visitor receives the reply.
Step 5 — Verify the Integration
| Check | Expected Result |
| Web Chat launcher | Visible on the website |
| Widget opens | Chat interface loads successfully |
| Visitor session | Visitor can start or resume a conversation |
| Message sending | Test message reaches YS Desk |
| Workspace | Conversation appears for the support team |
| Agent reply | Visitor receives the response |
| Real-time updates | Conversation changes appear without requiring a full page refresh |
The implemented real-time flow uses Socket.IO for message delivery and conversation updates between the Web Chat widget and YS Desk workspace.
What Happens After Initialization
When the SDK starts, it initializes the configured channel and establishes the client-side Web Chat environment.
The SDK then creates the Web Chat launcher and an isolated widget iframe. Communication between the host page and widget is handled through the SDK’s integration layer.
At a high level:
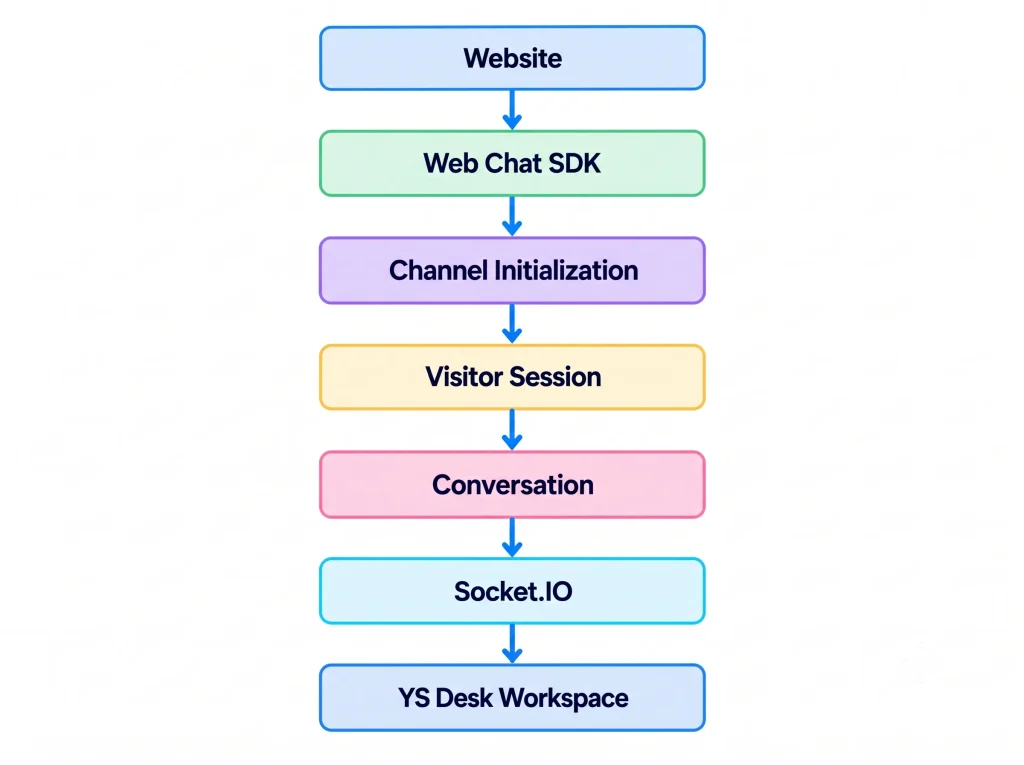
This is the same customer communication flow described in the Platform Architecture documentation.
See [Platform Architecture] for the complete architecture.
Need Help?
Email: support@ysdesk.com
Documentation: https://docs.ysplugins.com/ys-desk