
An exhaustive, step-by-step operational manual for enabling pre-sale customer questions, managing Q&A moderation, publishing store answers, and configuring custom criteria fields.
Section 1: Enabling Customer Q&A Field in Form Customizer
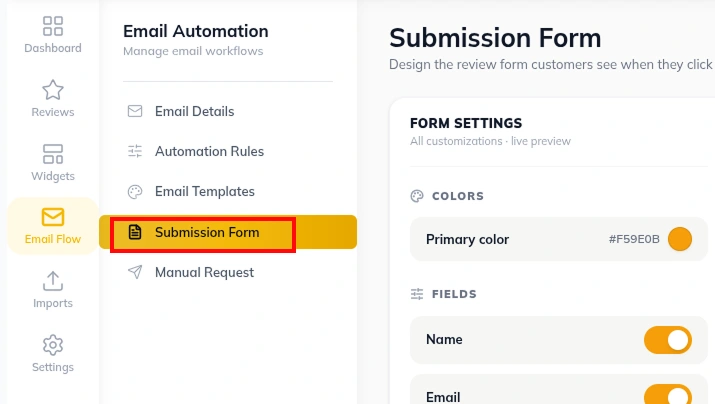
To start receiving pre-sale shopper inquiries, you must first enable the Customer Q&A question module inside the submission form customizer.
Step 1.1: Accessing Submission Form Settings
1. Log into your WordPress Admin Dashboard .
2. Click Hyoka in the left WordPress menu.
3. In the Hyoka primary navigation sidebar, click Email Flow, then select the Submission Form sub-tab
Section 2: Storefront Pre-Sale Q&A Submission & Tab Display
Once activated, Hyoka injects an interactive Q&A tab onto your WooCommerce product pages
.
Step 2.1: How Shoppers Ask Questions on Single Product Pages
1. Shoppers visit any WooCommerce product page and scroll to the review section.
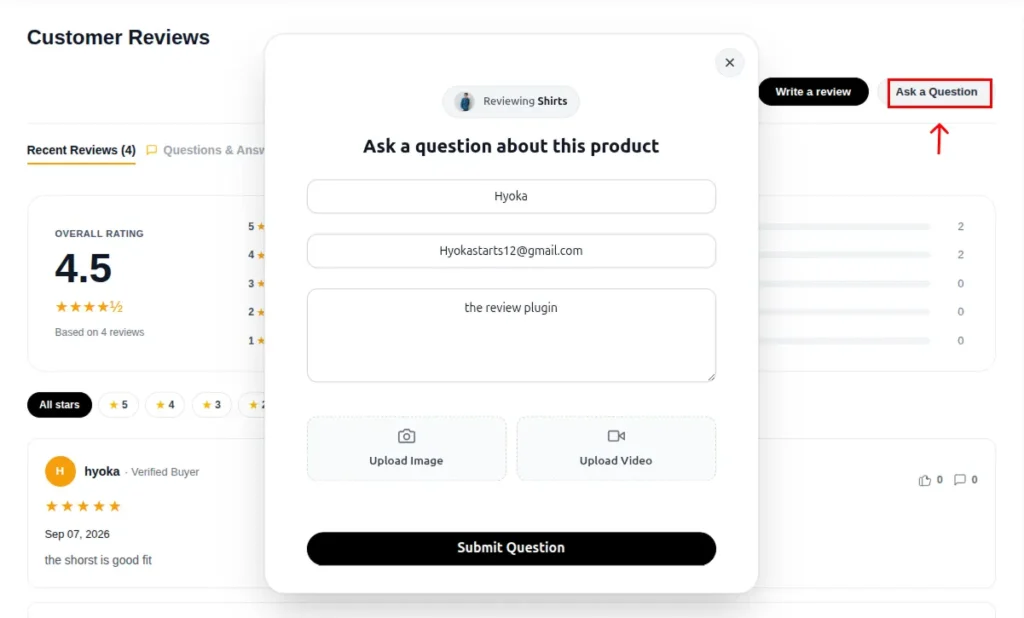
2. Under the Questions & Answers tab, shoppers click Ask a Question.
3. A modal opens asking for:
Question Text: Pre-sale inquiry (e.g., “Is this jacket waterproof or water-resistant?”).
Customer Name & Email: For order lookup and email notification when an answer is
Published.
4. Clicking Submit Question sends the inquiry directly to your admin moderation drawer.
Section 3: Navigating Customer Q&A Moderation Dashboard
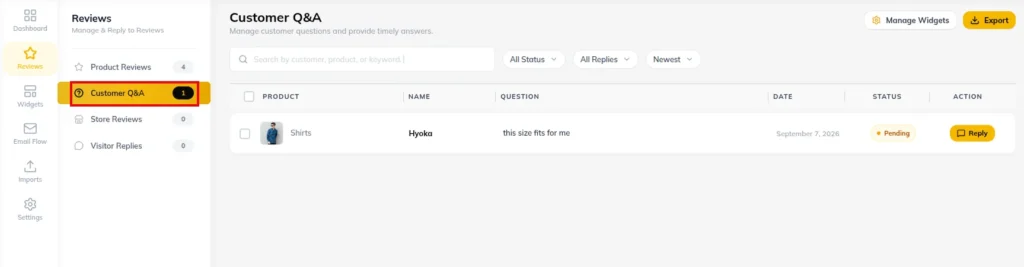
Store owners can view, filter, search, and manage all incoming pre-sale inquiries in the dedicated Customer Q&A Dashboard.
Step 3.1: Accessing the Q&A Moderation Dashboard
1. In the Hyoka sidebar, click Reviews.
2. Select the Customer Q&A sub-tab
Step 3.2: Reviewing Question Card Details
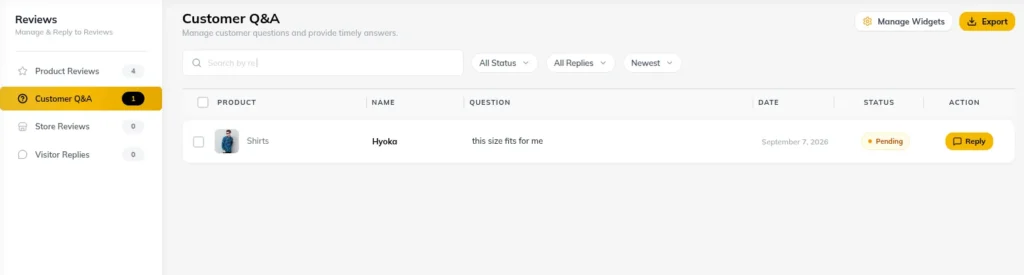
Each question card displays:
Product Thumbnail & Name: Direct reference to the product in question.
Customer Name: Name of the inquiring customer.
Date Submitted: Exact date and time stamp.
Status Indicator: Displays “Pending reply…” (orange italic indicator) when unanswered, or “↳ [Answer Snippet]” when answered.
Section 4: Replying to Questions, Thread Modals & Verified Answer Badges
Replying to customer questions publishes official merchant answers live onto your storefront.
Step 4.1: Opening the Question Reply Modal / Drawer
1. On any question card, click the orange Reply button (message square icon).
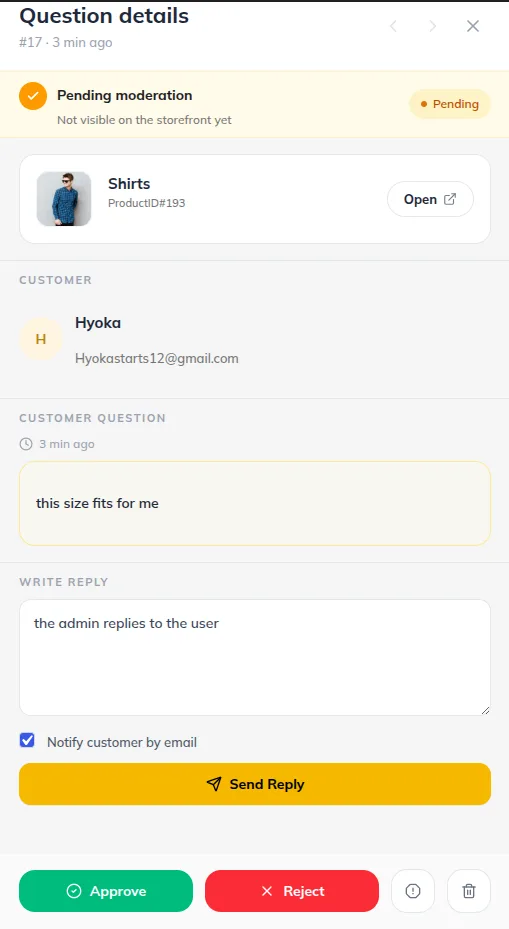
2. The Reply Modal / Question Drawer opens displaying full question details.
Step 4.2: Drafting & Publishing Store Answers
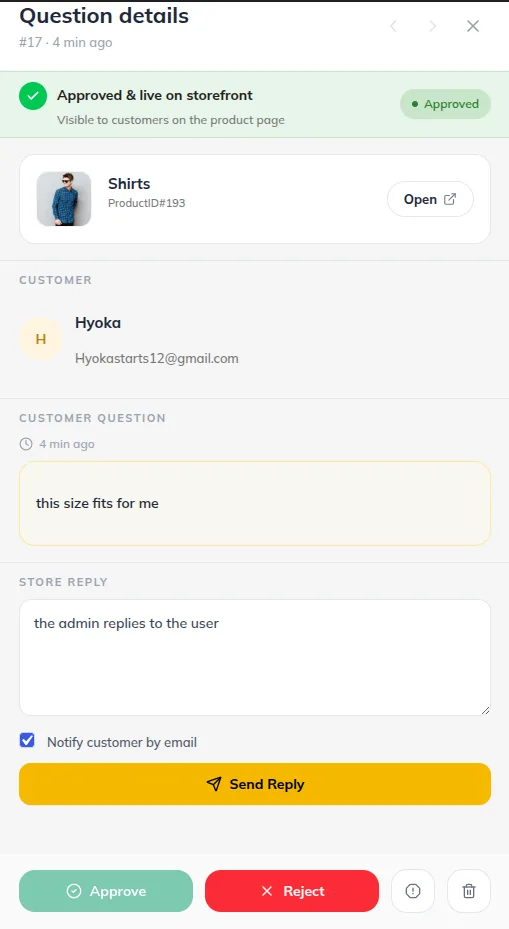
1. Type your official store response in the answer text area (e.g. “Yes! This jacket features a 10,000mm waterproof membrane and taped seams.”).
2. Or click Generate AI Answer to draft a response using the AI Assistant.
3. Click Submit Reply.
Step 4.3: Multi-Turn Thread Support & Frontend Badges
1. Click Thread on answered questions to view or add follow-up customer responses.
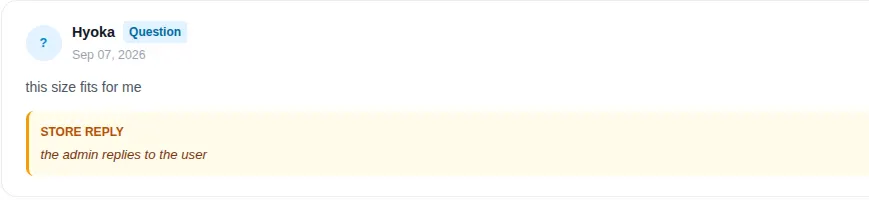
2. Published answers immediately render beneath the customer’s question on your product page with a highlighted “Official Store Answer” badge.
Need Help?
Email Support: support@ysinnovations.com
Developer Documentation: https://docs.ysplugins.com/hyoka