
A step-by-step guide explaining how the Master Automation Toggle switch works, configuring order status triggers, delivery delay timing, and post-purchase email workflows.
Step 1: Navigating to Automation Rules & Email Flow
1. Log into your WordPress Dashboard.
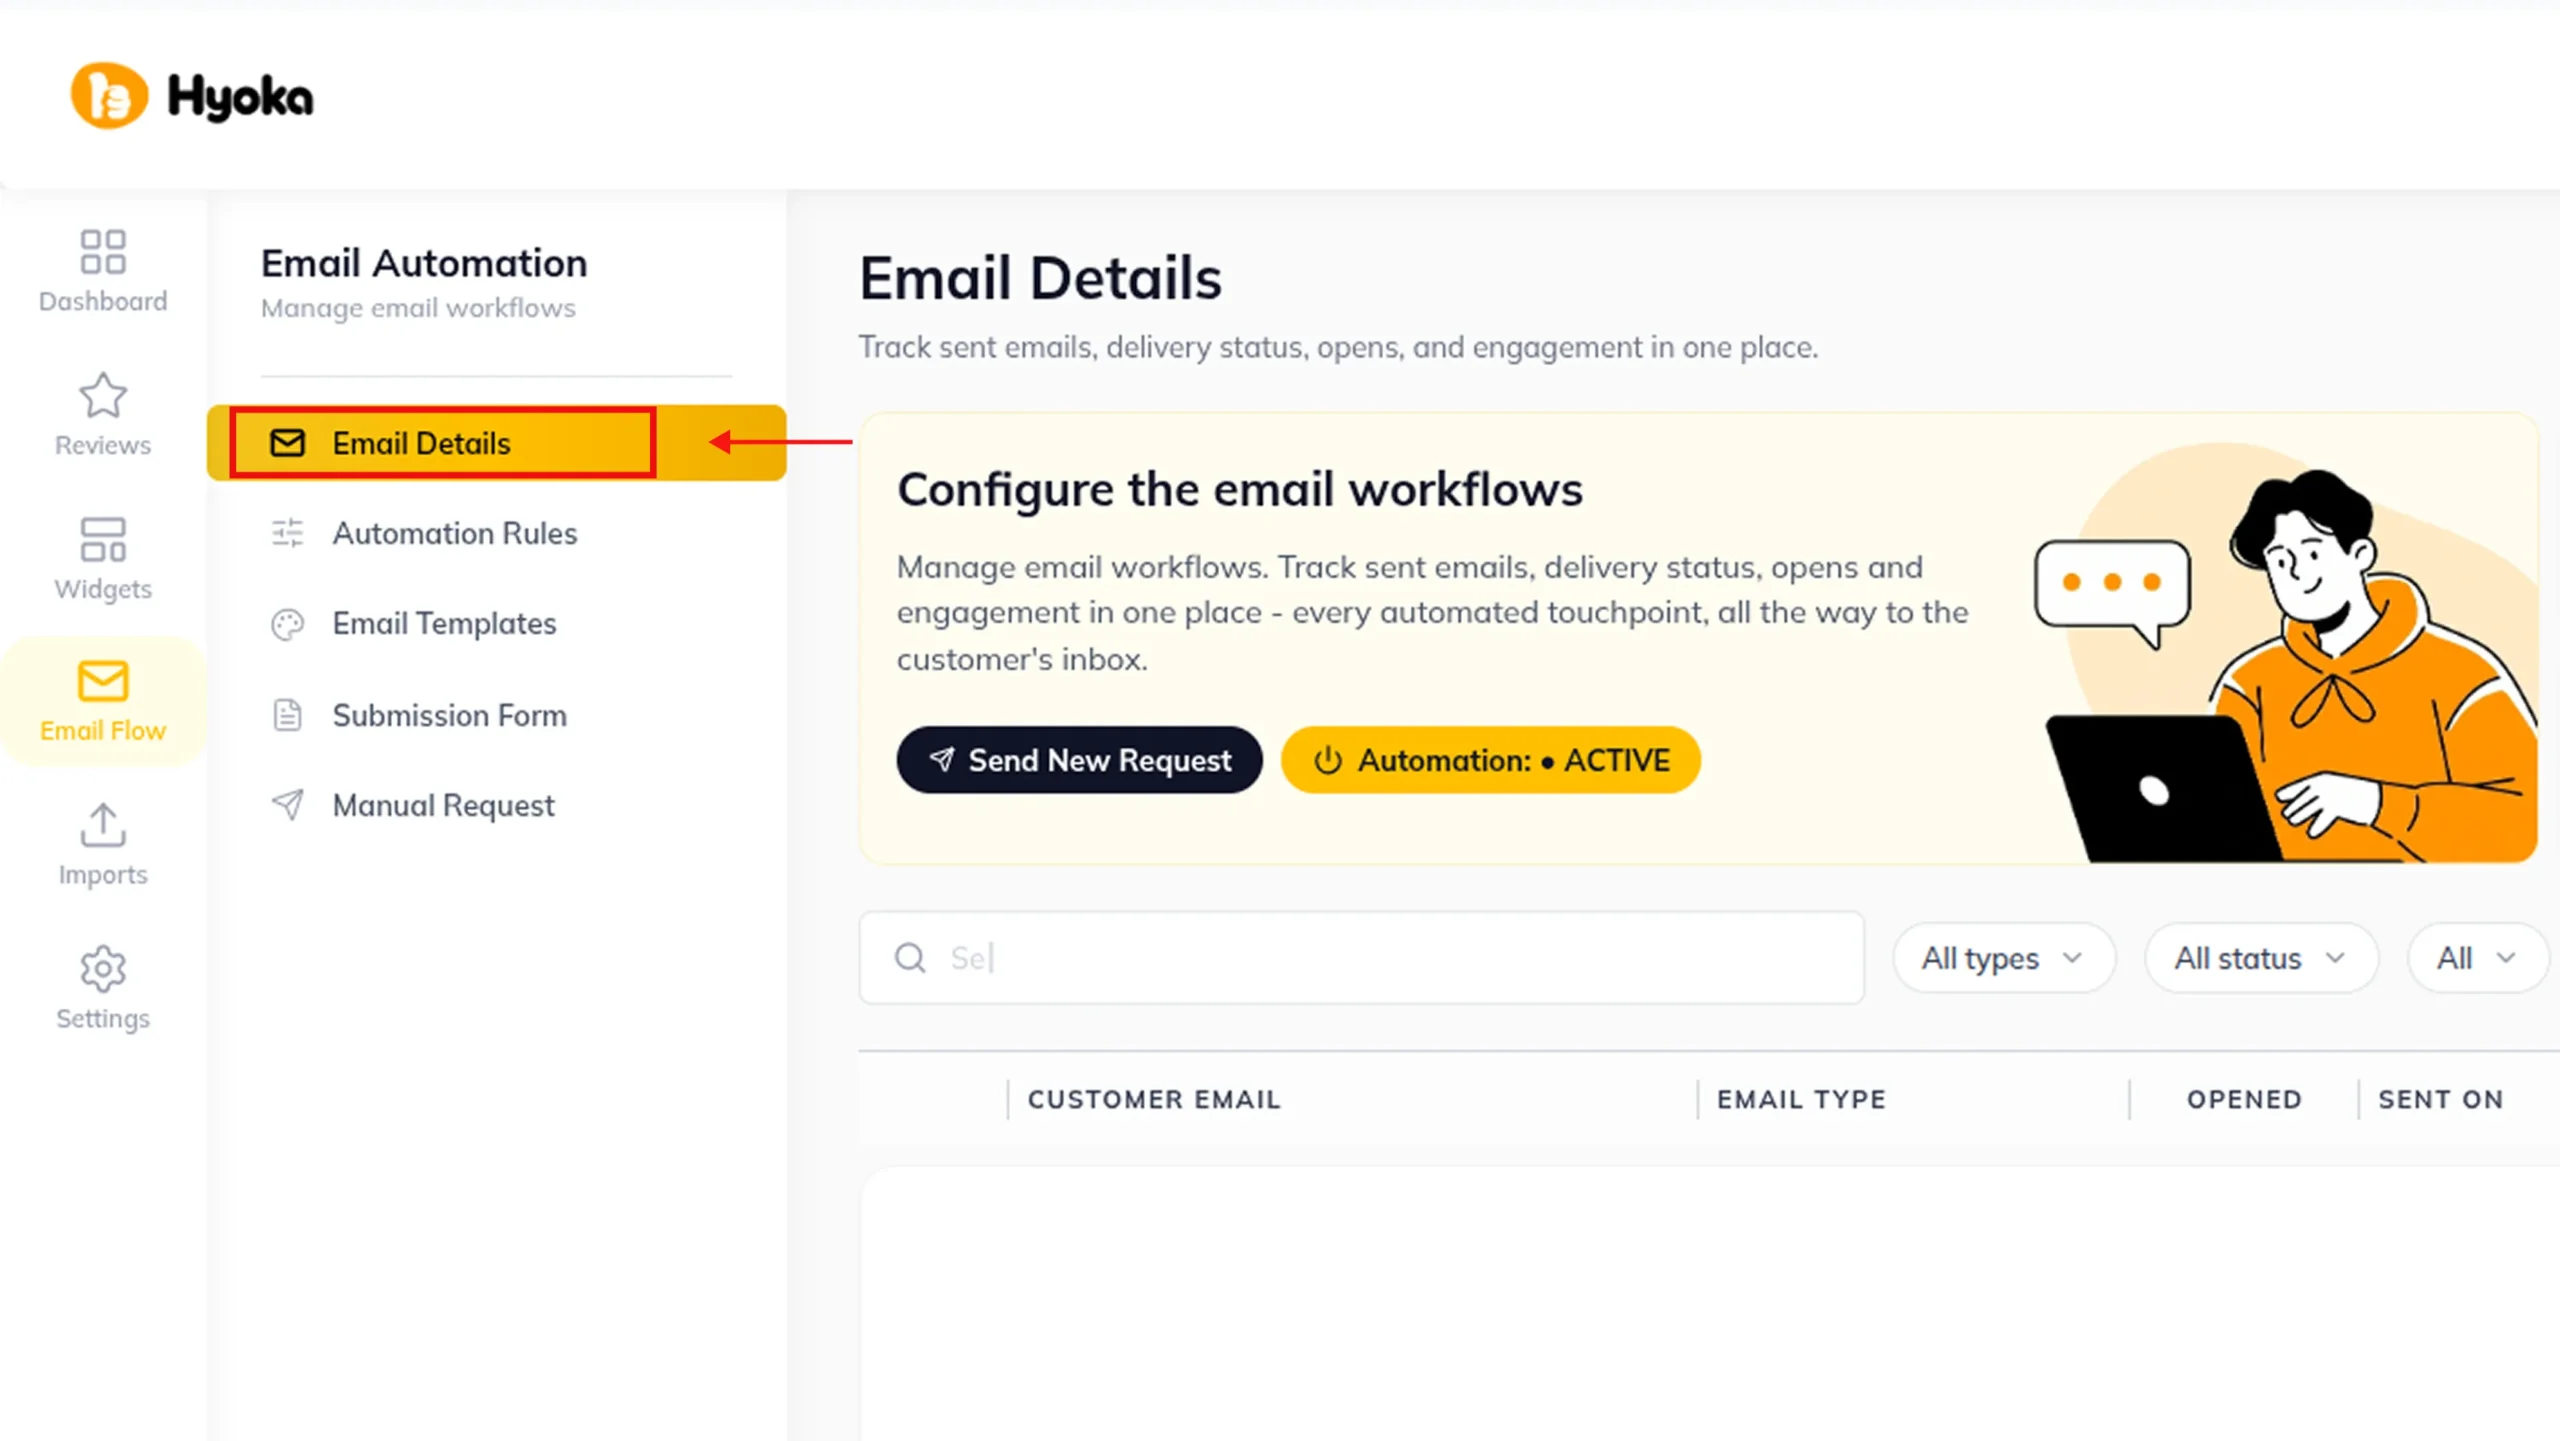
2. Click Hyoka in the left WordPress menu.
3. Select Email Flow in the primary navigation sidebar, then click the Automation Rules sub-tab.
Step 2: Understanding the Master Automation Toggle Switch & How It Operates
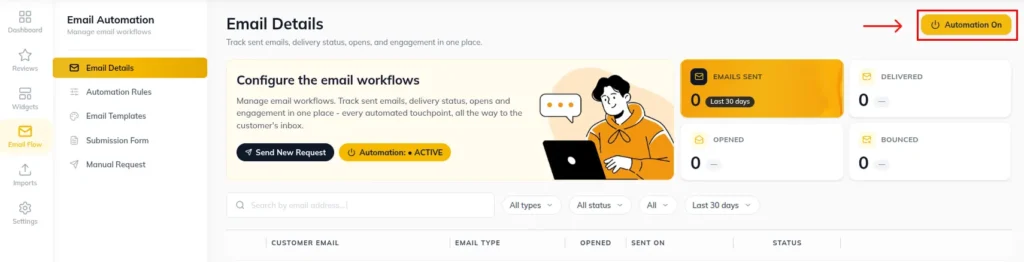
1. Locate the Automation Master Switch at the top of the Automation Rules panel.
2. How It Works:
ON (Enabled): Hyoka monitors all incoming WooCommerce orders. When an order matches
your trigger status, an automated background job queues a review request email for delivery
after your specified delay days.
OFF (Disabled): No automatic emails are scheduled or sent. Review request emails can only
be sent manually.
Step 3: Setting Order Status Triggers (Completed vs Processing)
1. Under Trigger Condition, select which order status triggers an automated request:
Completed (Recommended: triggers only when an order is fulfilled and shipped)
Processing (Triggers as soon as payment is confirmed)
2. Select target product categories or leave empty to include all WooCommerce catalog items.
Step 4: Configuring Post-Purchase Timing & Delivery Delay
1. Enter the Delivery Delay Period (e.g., 7 Days or 14 Days ).
2. Best Practice: Set the delay based on average shipping duration plus product usage time so customers receive the email after testing their purchased item.
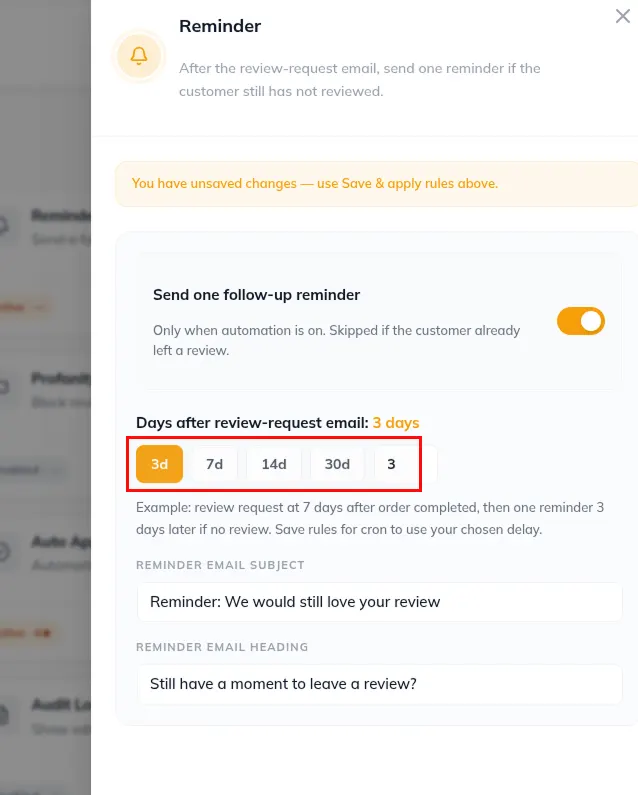
3. Save automation rules.
Step 5: Connecting Automation Rules to Email Templates
1. Click Email Flow in the primary navigation sidebar, then click Email Templates.
2. Select Review Request template and click On the Template.
3. Personalize your store logo, subject line, banner, dynamic merge tags
( {customer_first_name} ,{product_title} ), and review button styling.
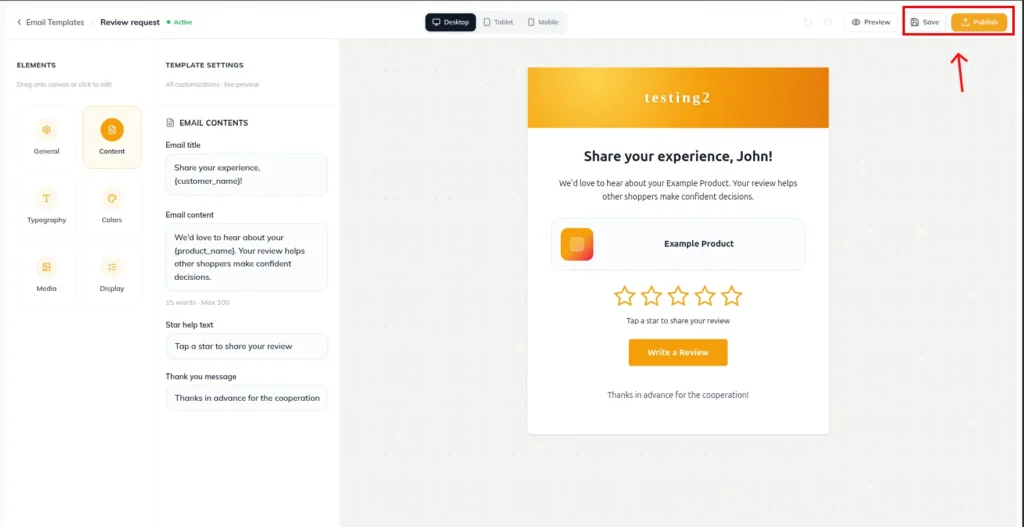
4.Click save or publish after editing the template.
Step 6: Monitoring Automated Queues & Manual Review Requests
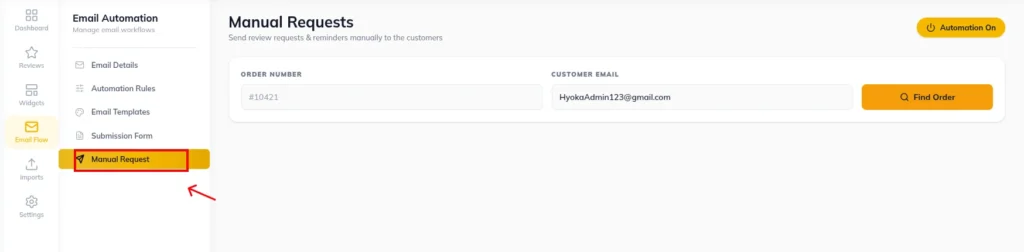
1. To view or dispatch manual requests alongside automated flows, click Email Flow → Manual Request.
2. Enter a past order ID or customer email to dispatch an immediate review invitation or while the automation toggle is disabled.
3. Monitor overall email conversion metrics under Hyoka → Dashboard.
Need Help?
Email: support@ysinnovations.com
Documentation: https://docs.ysplugins.com/hyoka