
A step-by-step guide to enabling visitor community replies, moderating pending comments, posting store owner responses, and configuring email notifications.
Step 1: Understanding Visitor Replies & Community Discussion
1. Visitor Replies: Allows verified shoppers or prospective buyers to reply publicly to published product reviews on WooCommerce single product pages.
2. Moderation Pipeline: Visitor replies undergo automated moderation filtering ( pending , approved , or spam ). Pending replies remain hidden from the public frontend until approved by a store administrator.
3. Store Responses: Store managers can post official, highlighted store responses directly to customer reviews from the WP Admin drawer.
Step 2: How Store Visitors Submit Replies on Product Pages
1. On any published WooCommerce product page, visitors scroll to the Hyoka Product Reviews widget.
2. Under any published review, visitors click the Reply iocn.
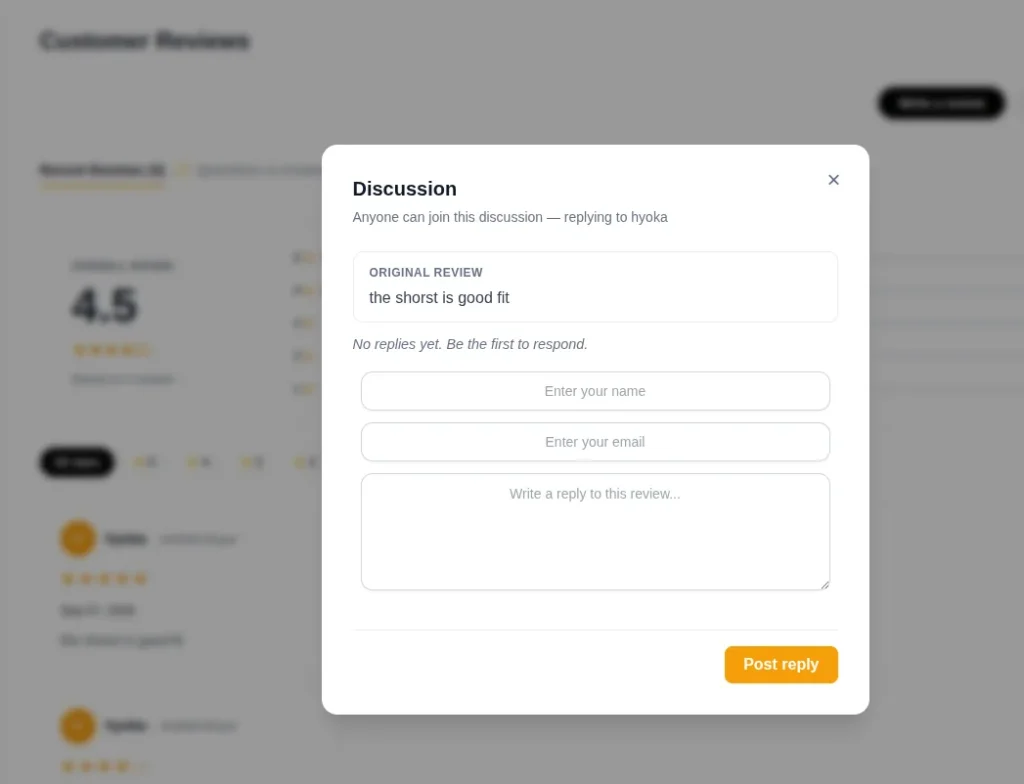
3. A inline form opens allowing the visitor to enter:
Author Name: Visitor’s display name.
Email Address: Used for email notifications when approved.
Reply Content: Text content (up to 2,000 characters).
1. Upon clicking Submit Reply, visitors receive a confirmation message: *”Thanks! Your reply will appear after moderation.”*
Step 3: Accessing the Visitor Reply Moderation Drawer in Admin
1. Log into your WordPress Admin Dashboard.
2. Navigate to Hyoka → Visitor replies in the left sidebar.
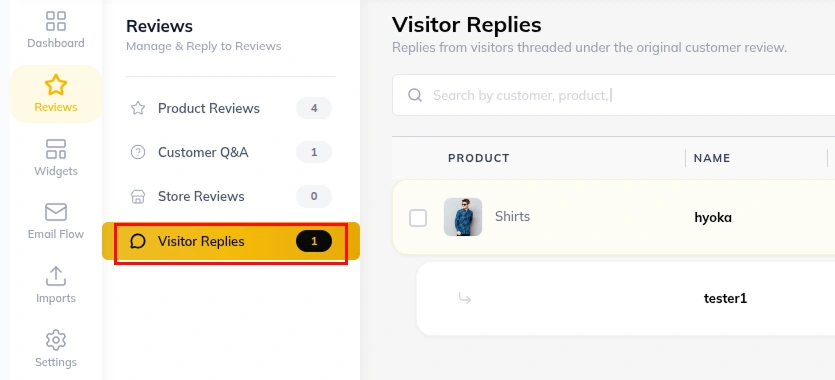
3. Reviews containing visitor replies display a reply count icon in the review table.
4. Click on any review row or click View Details / Reply to open the Visitor Reply Drawer.
Step 4: Moderating Pending Visitor Replies (Approve / Reject)
1. Inside the Visitor Reply Drawer, scroll to the Customer review section.
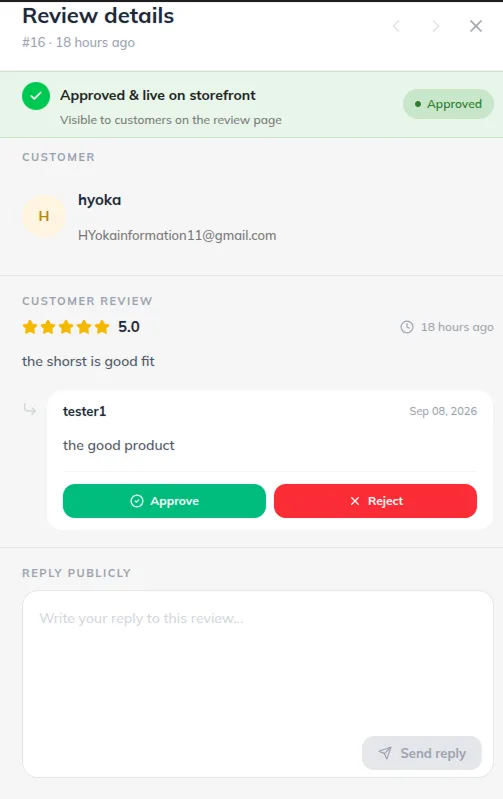
2. Any visitor reply pending moderation appears nested under the review with a CornerDownRight connector icon and a Pending status label.
3. To publish the reply: Click the green Approve button ( CheckCircle2 ). The reply instantly becomes visible on the storefront.
4. To decline the reply: Click the red Reject button ( XIcon ). The reply is rejected and hidden.
Step 5: Posting Official Store Owner Responses
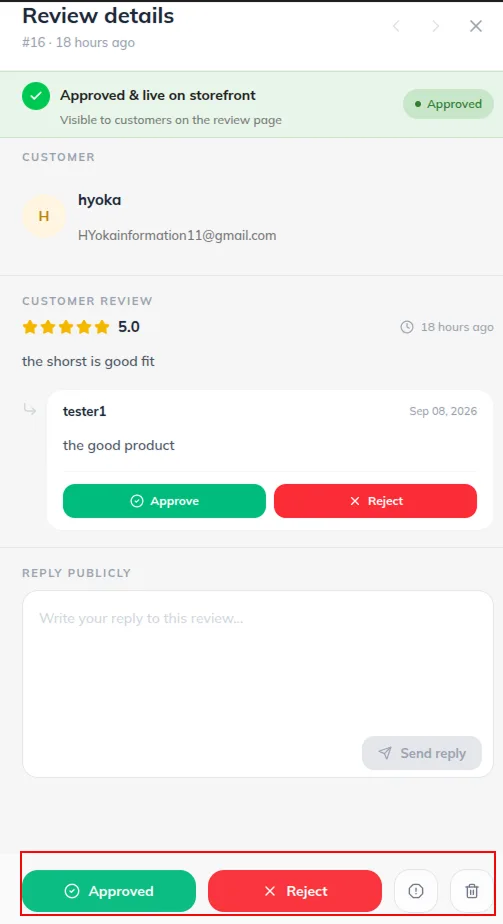
1. In the Visitor Reply Drawer, scroll to the bottom section labeled Reply publicly.
2. Enter your official store response into the text area.
3. Click Send Reply (or Edit Reply if an existing store response is published).
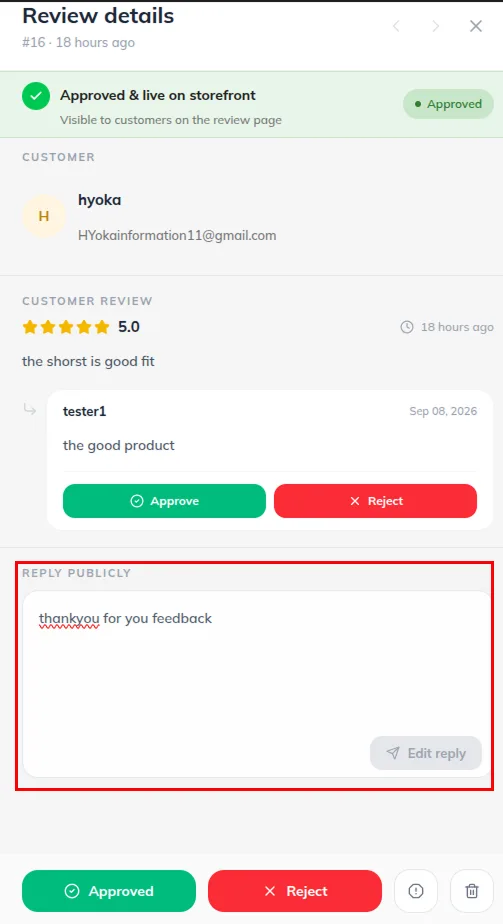
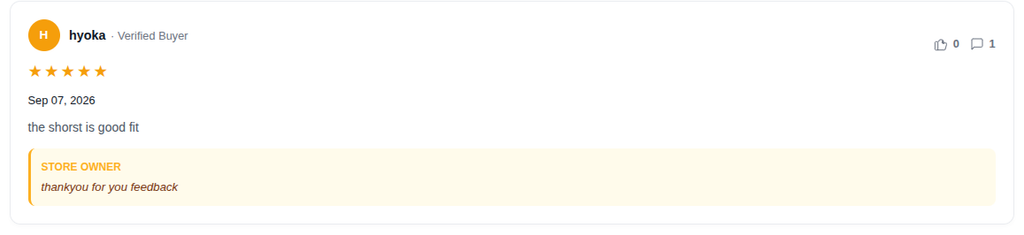
4. The response will be saved and rendered prominently with an official Store Owner badge on the product page.
Step 6: Configuring Automated Email Notifications for Replies
1. When a visitor reply or store response is approved, Hyoka automatically sends an email notification to the original reviewer.
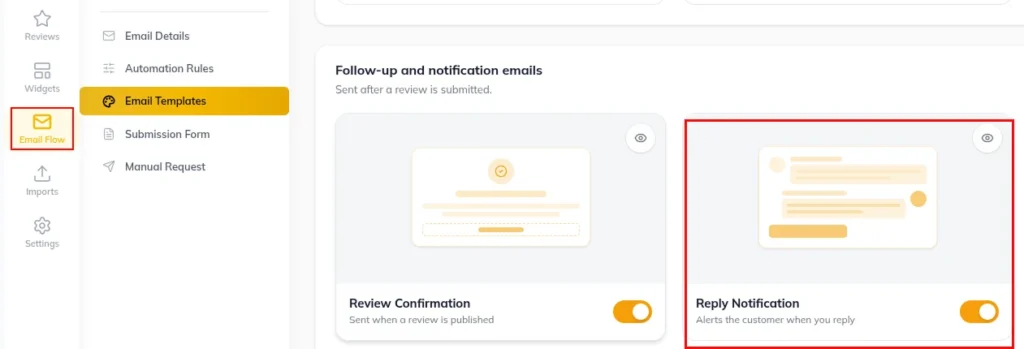
2. Go to Hyoka -> Email Flow -> Email Templates.
3. Under Notification Templates, locate the Reply Notification template and enable the toggle on.
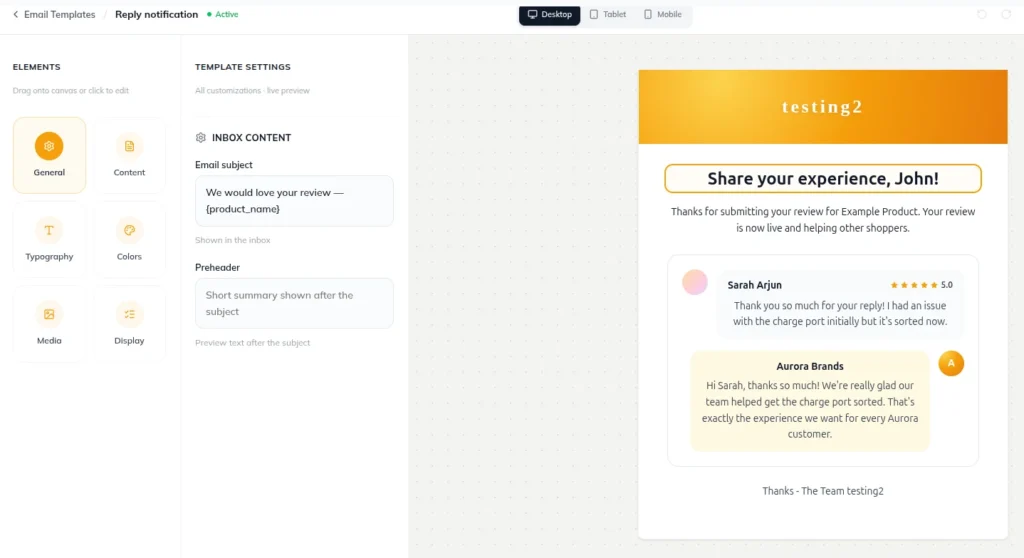
4. Enable the template and customize dynamic placeholders ( {author_name} , {reply_author} , {reply_content} ,{product_name} ).
Need Help?
Email: support@ysinnovations.com
Documentation: https://docs.ysplugins.com/hyoka