
A step-by-step guide to configuring post-purchase email triggers, delivery delays, email banners, and automated review request flows.
Step 1: Navigating to Automation Rules & Email Flow
1. Log into your WordPress Dashboard .
2. Click Hyoka in the left WordPress menu.
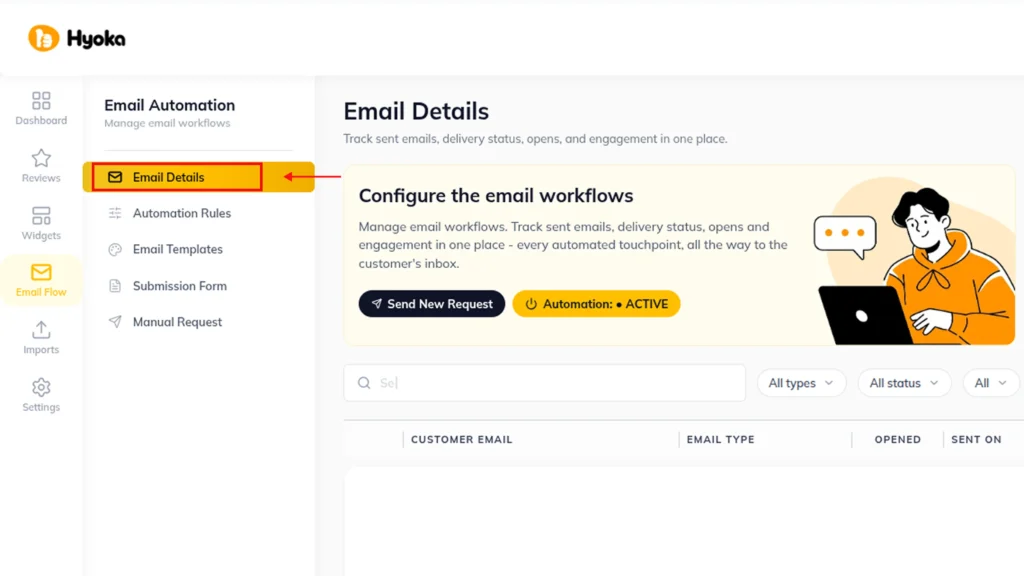
3. Select Email Flow in the primary navigation sidebar, then click the Email Details sub-tab.
Step 2: Enabling Automated Post-Purchase Email Triggers
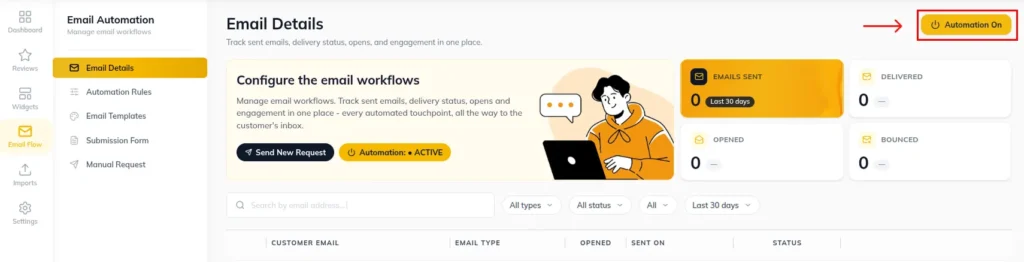
1. Under Email Details the Automation Master Switch to ON.
2. Enable automated review request emails for completed WooCommerce purchases.
Step 3: Configuring Order Status & Timing Delay
1. Choose the trigger order status (e.g., Completed or Processing).
2. Set the reminder delay period (e.g., 7 Days or 14 Days post-purchase to allow time for product delivery).
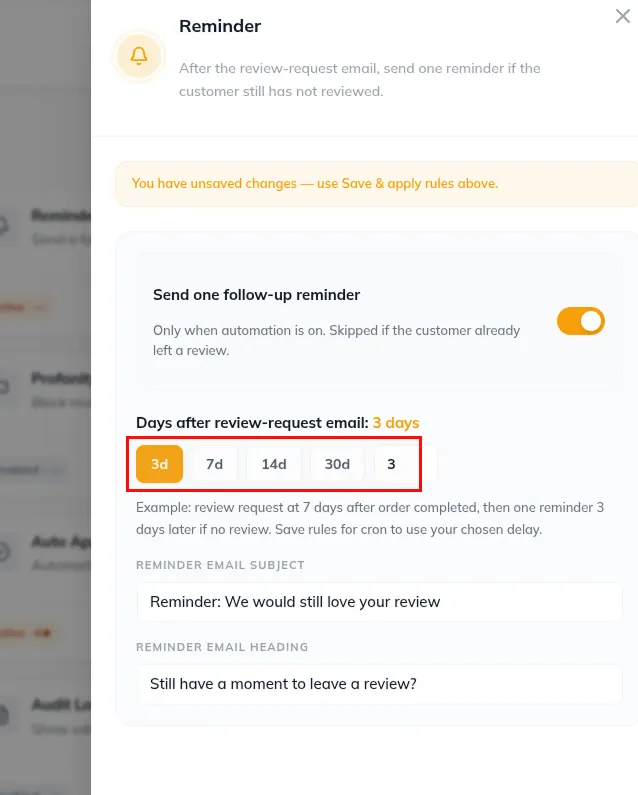
3. Save Automation rules.
Step 4: Customizing Email Templates, Banners & Branding
1. Click Email Flow in the primary navigation sidebar, then click Email Templates.
2. Select the Review Request template and click On the Template.
3. Select a header banner image, personalize subject lines (e.g., “How was your recent purchase, {customer_first_name}?”), and edit CTA button styling.
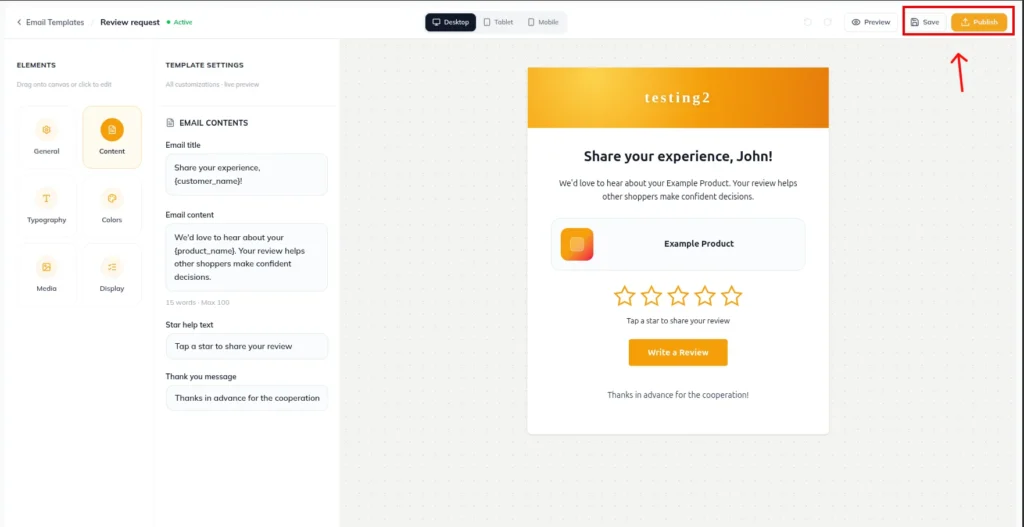
4.After updating the styles click the save or publish.
Need Help?
Email: support@ysinnovations.com
Documentation: https://docs.ysplugins.com/hyoka