
A step-by-step guide to setting up customer review forms, star ratings, verified buyer badges, and storefront review widgets.
Section 1: Configuring Review Collection & Pagination Rules
The first step in setting up Hyoka is configuring global review display limits, verified buyer trust badges, and administrator email alerts.
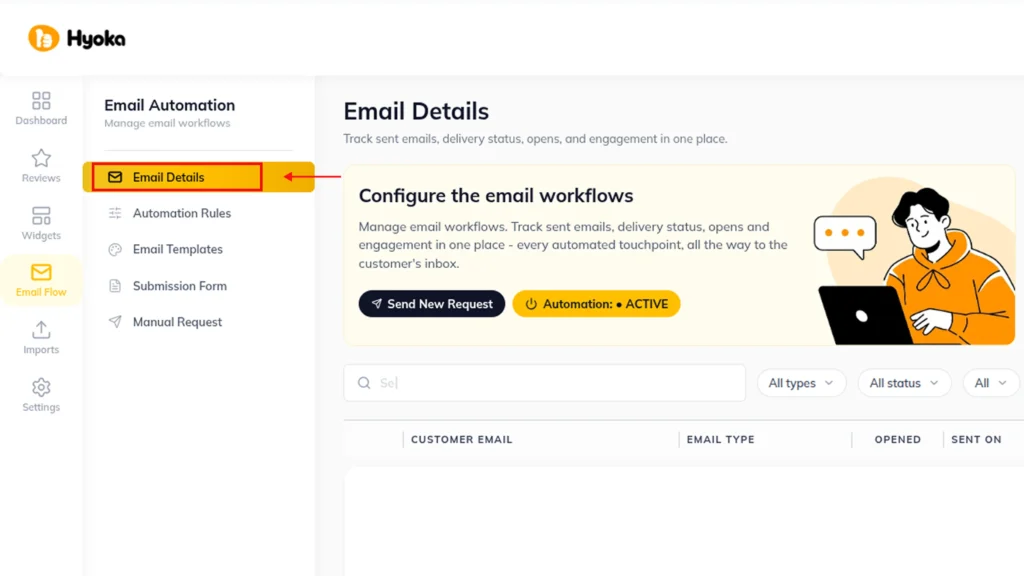
Step 1.1: Accessing Email Details Panel
1. Log into your WordPress Admin Dashboard.
2. Click Hyoka in the left WordPress navigation menu.
3. In the Hyoka sidebar -> click Email Flow, then select the Email Details sub-tab.
Step 1.2: Configuring Pagination & Review Limits Per Page
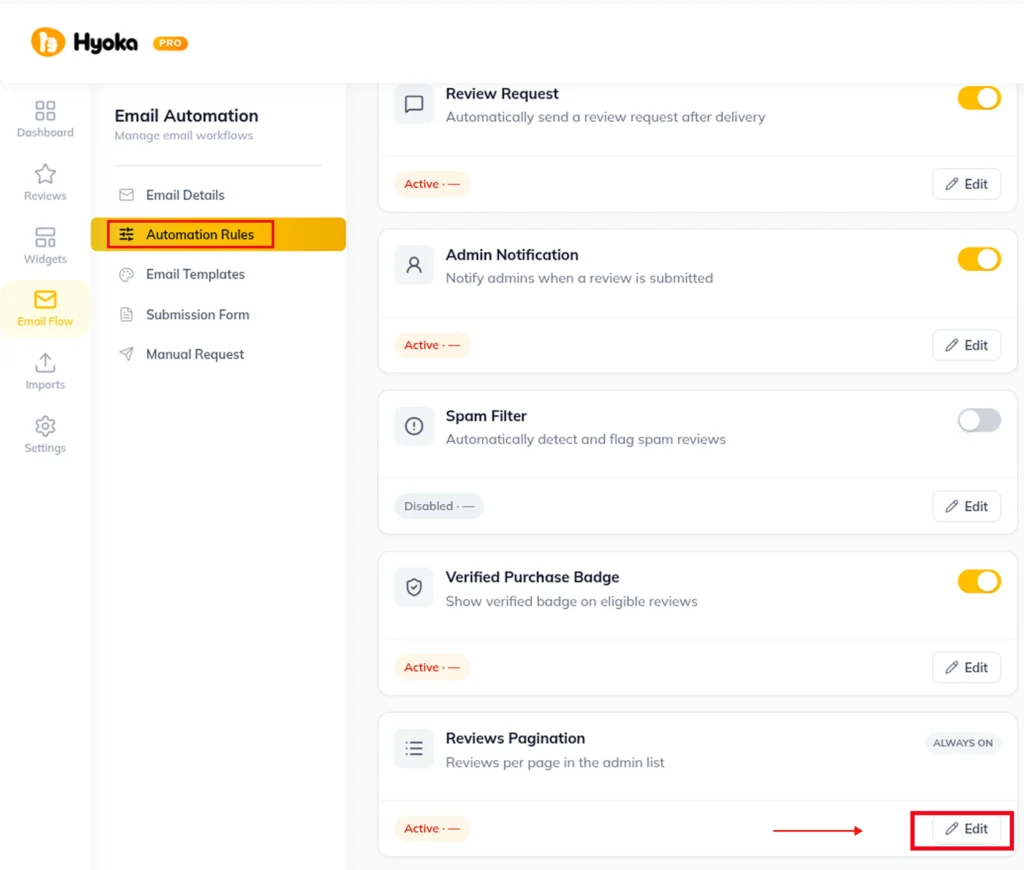
1. Select the Automation Rules Tab -> Reviews pagination -> click Edit
2. Select the number of reviews to display per pagination page on single product tabs
(Options: 10 ,20 , 50 , or 100 ).
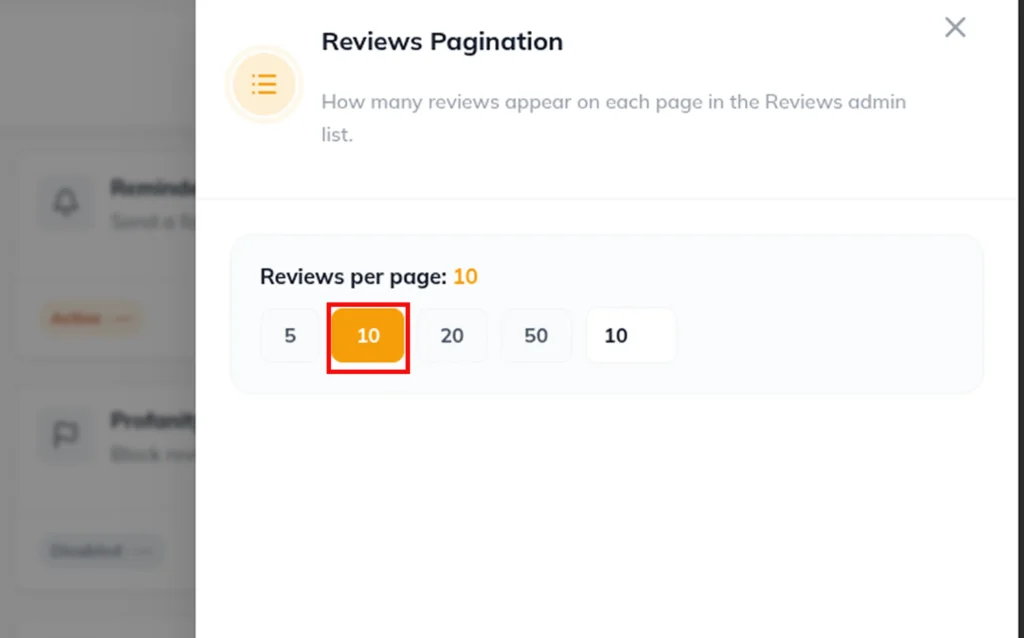
3. Best Practice: Set to 10 or 20 for optimal page load speed and mobile responsiveness,and click save &apply rules button.
Step 1.3: Enabling Verified Purchase Badges
1. Locate the Show Verified Purchase Badge toggle switch.
2. Toggle the switch to ON (Enabled).
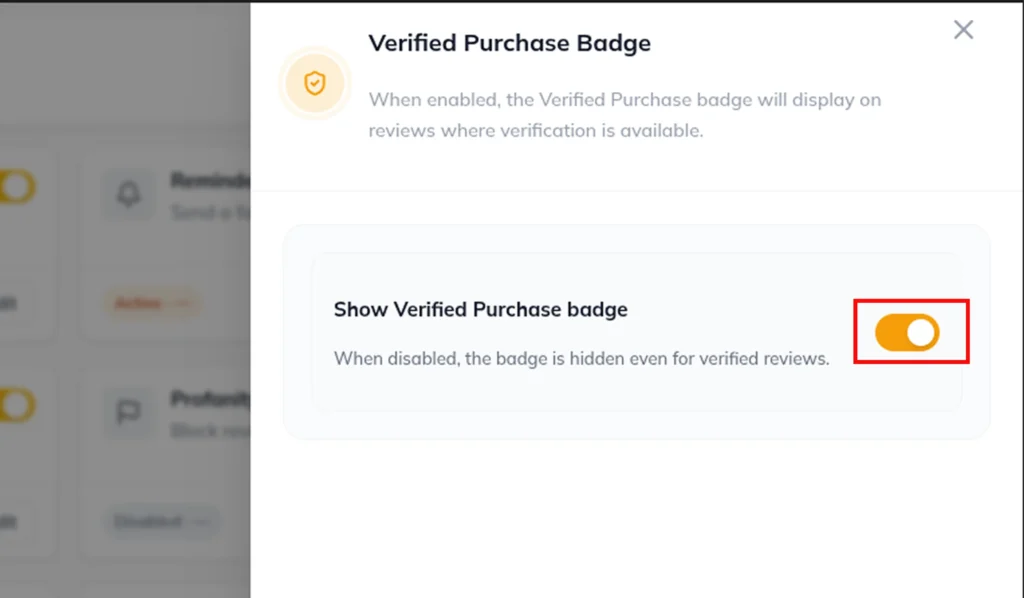
3. How It Works: Hyoka cross-references reviewer email addresses against past WooCommerce order records. When a match is verified, a “Verified Buyer” badge is automatically appended to their published review.
Step 1.4: Admin Notifications & Audit Log Tracking
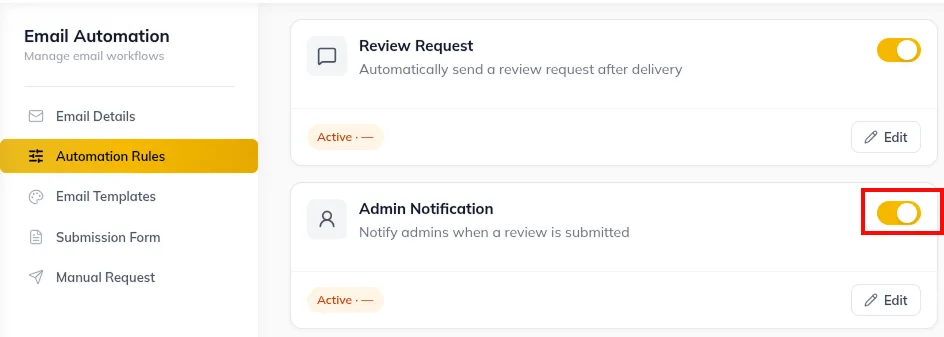
1. Toggle Admin Notifications Enabled to ON -> click edit to add your Emails to receive instant email notifications whenever a new review is submitted.
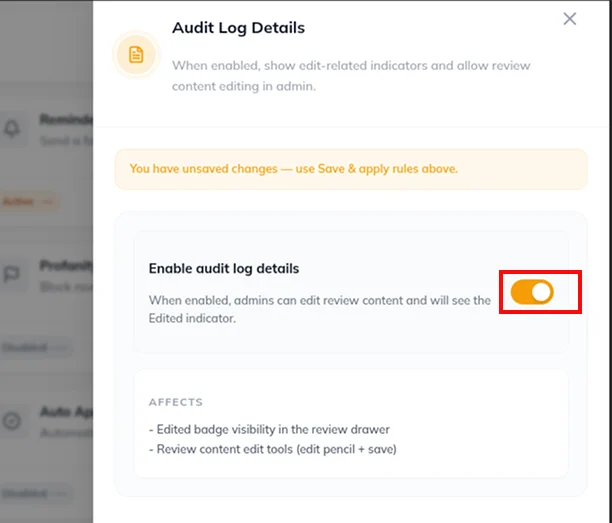
2. Toggle Show Audit Log Details to track order IDs, and submission timestamps for security auditing.
3. Click Save Settings at the bottom of the form.
Section 2: Customizing the Review Submission Form
Hyoka allows you to build a fully customized, high-converting review submission modal that prompts customers for ratings, text, sub-attribute sliders, photo attachments, and Q&A questions.
Step 2.1: Opening the Submission Form Customizer
1. In the Hyoka sidebar, click Email Flow.
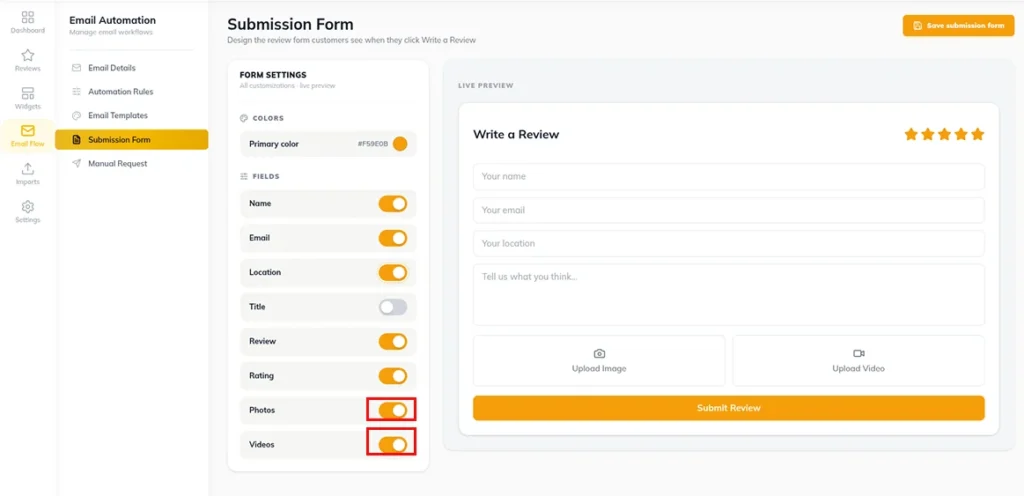
2. Select the Submission Form sub-tab and edit ,add the styles and fields.
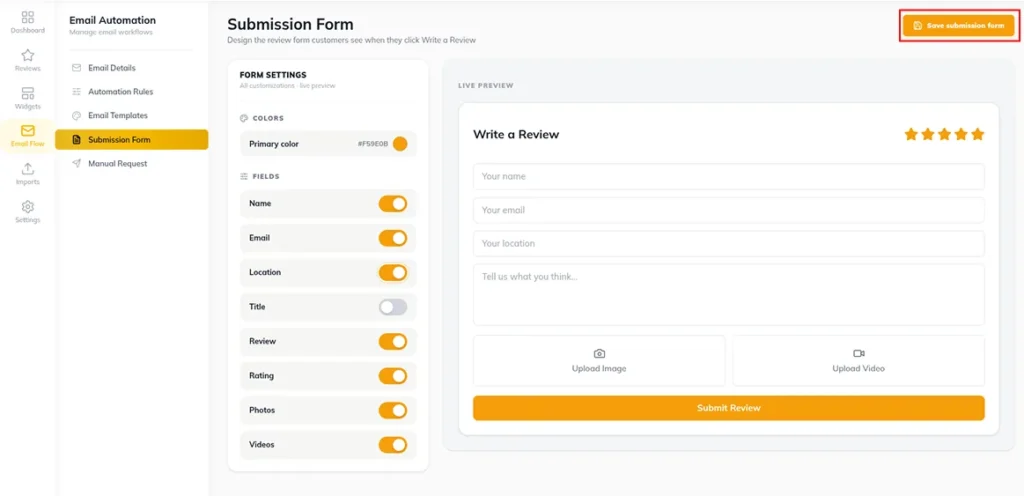
3.Click on the Save submission form.
Step 2.2: Toggling Core Review Form Fields
1. Star Rating Field: Enabled by default (1 to 5 star scale).
2. Review Headline / Title: Toggle ON to require or allow a short review summary line (e.g. “Great quality product!”).
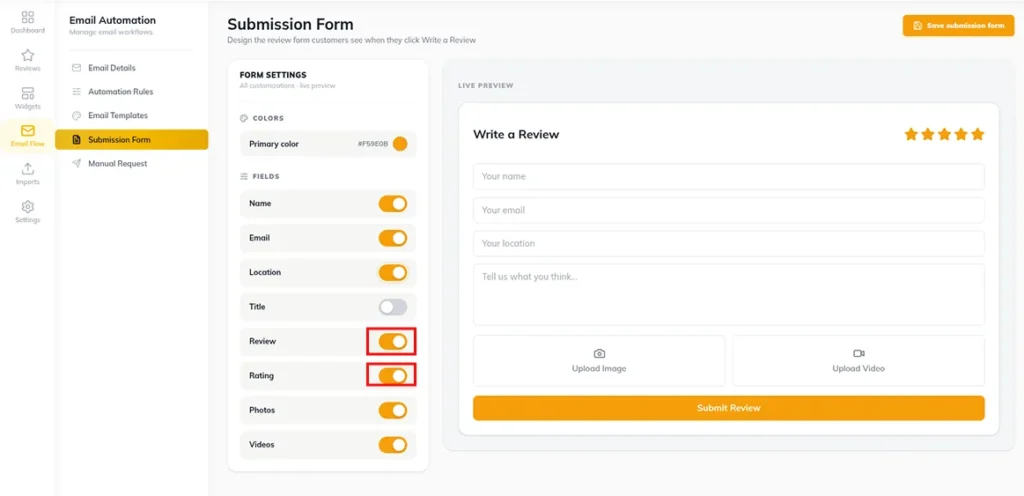
3. Review Body Text: Toggle ON to collect full written customer feedback.
Step 2.3: Enabling Photo & Video UGC Attachments
1. Locate Media Upload Settings in the form builder panel.
2. Toggle Allow Photo Uploads to ON.
3. Toggle Allow Video Uploads to ON.
Step 2.4: Enabling Pre-Sale Customer Q&A Field
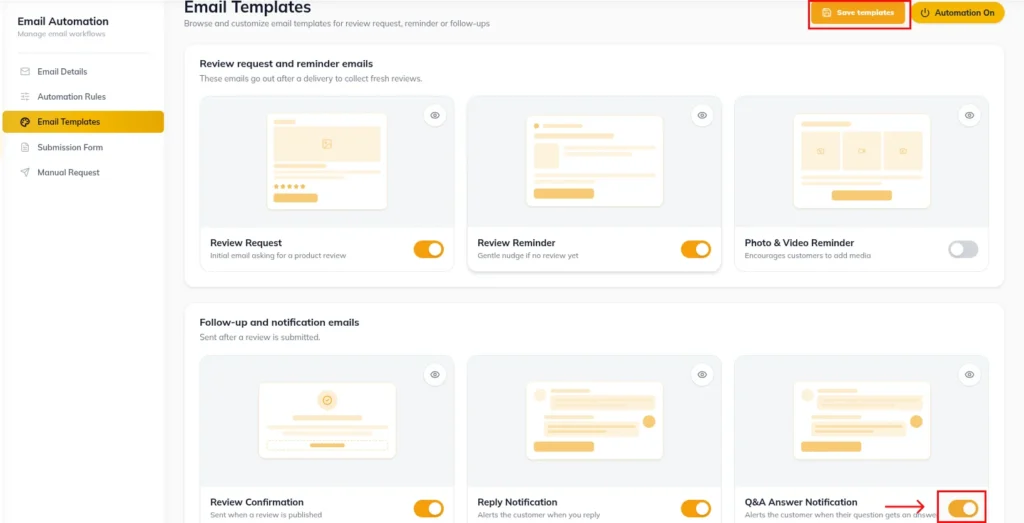
1. Toggle Enable Customer Questions (Q&A) to ON in Email templates
2. This allows shoppers to ask questions directly on product pages when submitting or browsing feedback.
3. Click Save submission form in the top right corner.
Section 3: Designing Front-End Review Widgets in Visual Editor
Hyoka features a drag-and-drop Visual Editor to style review display widgets so they match your store’s brand aesthetics perfectly.
Step 3.1: Accessing the Widgets Library
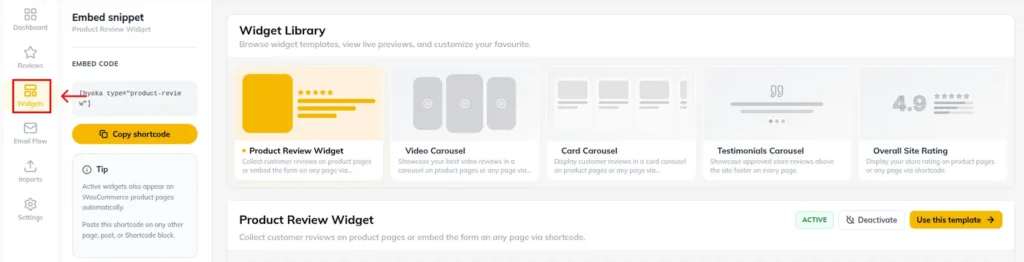
1. In the Hyoka sidebar, click -> Widgets
2. Explore the 5 pre-built Widget Templates:
Product Review Widget: Complete review list, star summary header, filter bar, and submission
Modal.
Site Rating Widget: Compact site-wide trust badge displaying average star score and review
Count.
Testimonials Carousel: Horizontal sliding card carousel for homepages and landing pages.
Card Carousel: Grid card display for featured customer quotes.
Video Carousel: Dedicated video UGC showcase grid.
Step 3.2: Customizing Widget Layout & Columns
1. Select Product Review Widget -> click Use this template.
2. In the right styling panel, click Layout Properties:
Choose Layout Style: Standard List, Masonry Grid, or Compact Tab.
Set Columns: 1 Column (Default List), 2 Columns , or 3 Columns .
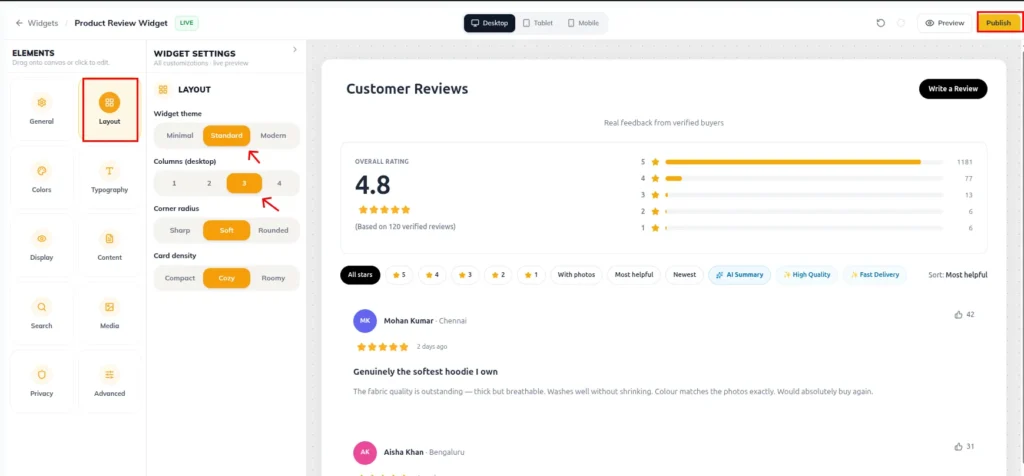
3. Click the publish.
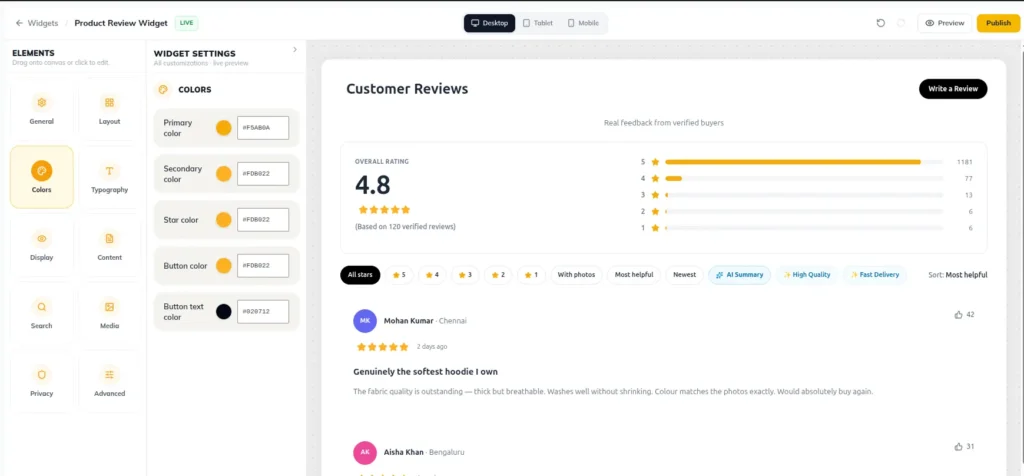
Step 3.3: Customizing Colors, Stars & Typography
1. Click Star Properties: Adjust star fill color (e.g. size ( 16px to #FFC107 Amber Gold), outline color, and star icon 24px ).
2. Click Header Properties: Toggle display of overall average rating score, rating distribution progress bars (5-star down to 1-star counts), and “Write a Review” CTA button styling.
3. Click Color Customizer: Set background colors, card border radius ( 4px ,
8px , 12px ), font family, and text colors.
Section 4: Review Moderation, Replies & Verified Buyer Badge Management
Maintaining high review quality and engaging with customer feedback requires regular review moderation.
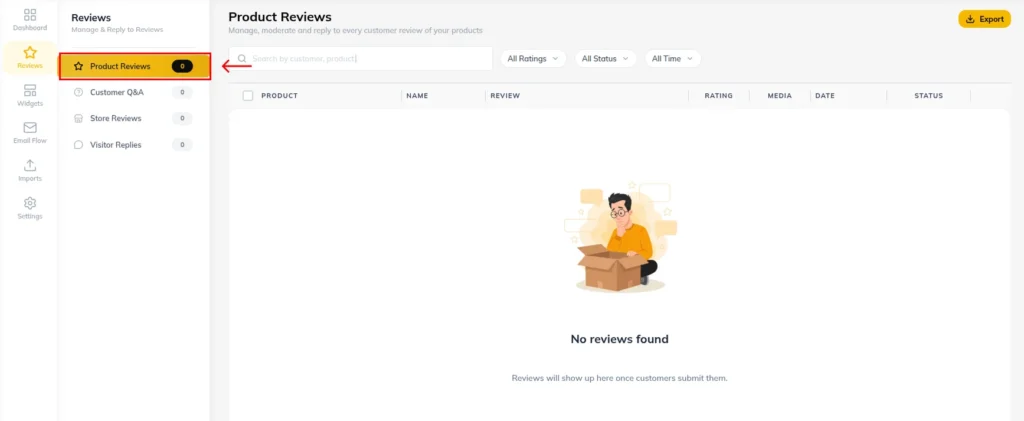
Step 4.1: Accessing the Product Reviews Moderation Panel
1. In the Hyoka sidebar, click Reviews.
2. Select Product Reviews sub-tab.
Step 4.2: Moderating Pending Submissions
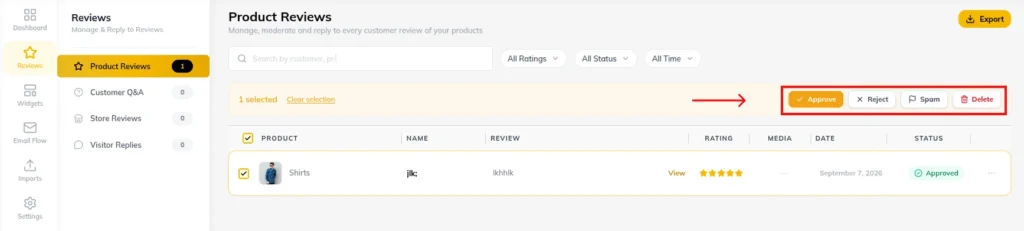
1. Filter reviews by status tab: Pending, Approved, Spam, Trash.
2. Review each submission:
Click Approve to publish the review instantly to the storefront.
Click Unapprove to remove a published review.
Click Spam or Trash to delete unwanted submissions.
Step 4.3: Replying to Customer Reviews as Store Owner
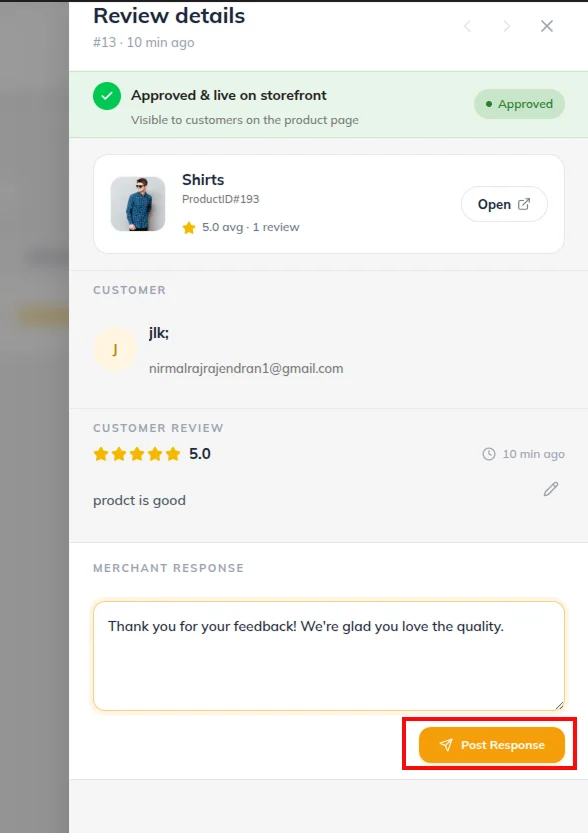
1. Click Reply on any customer review card.
2. Enter your store owner response (e.g. “Thank you for your feedback! We’re glad you love the quality.”).
3. Click Post response. Your response will display directly under the customer review on your store frontend with an “Official Store Response” badge.
Need Help?
Email Support: support@ysinnovations.com
Developer Documentation: https://docs.ysplugins.com/hyoka/