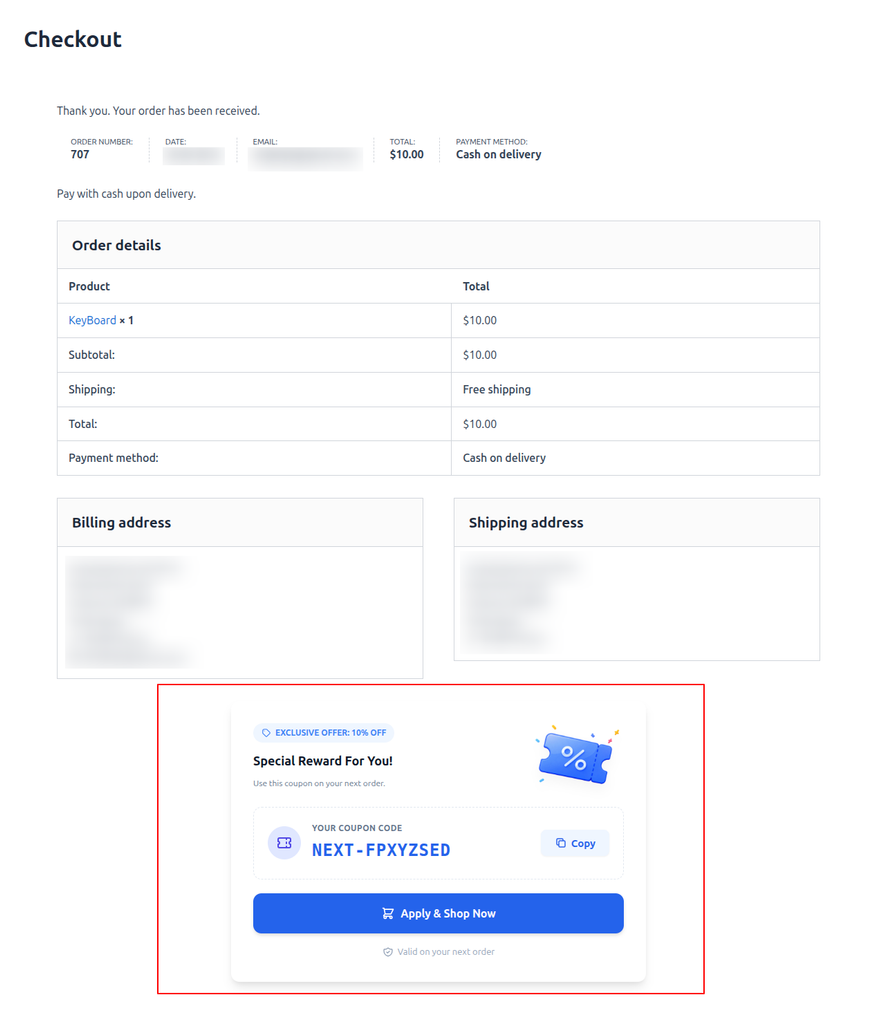
Next Order Coupon allows you to generate a unique coupon that customers can use on their next purchase.
Next Order Coupon is available with PickPair Pro.
1. Open PickPair
- Log in to your WordPress Dashboard.
- Click PickPair in the left-hand menu.
- Open Campaigns.
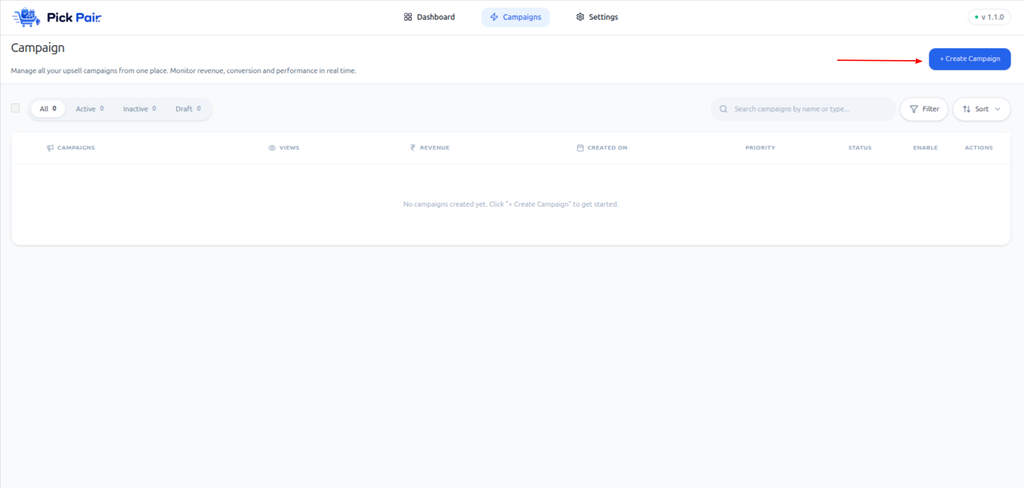
- Click + Create Campaign.
2. Choose the Campaign Type
- Select Next Order Coupon.
- Click Create Campaign.
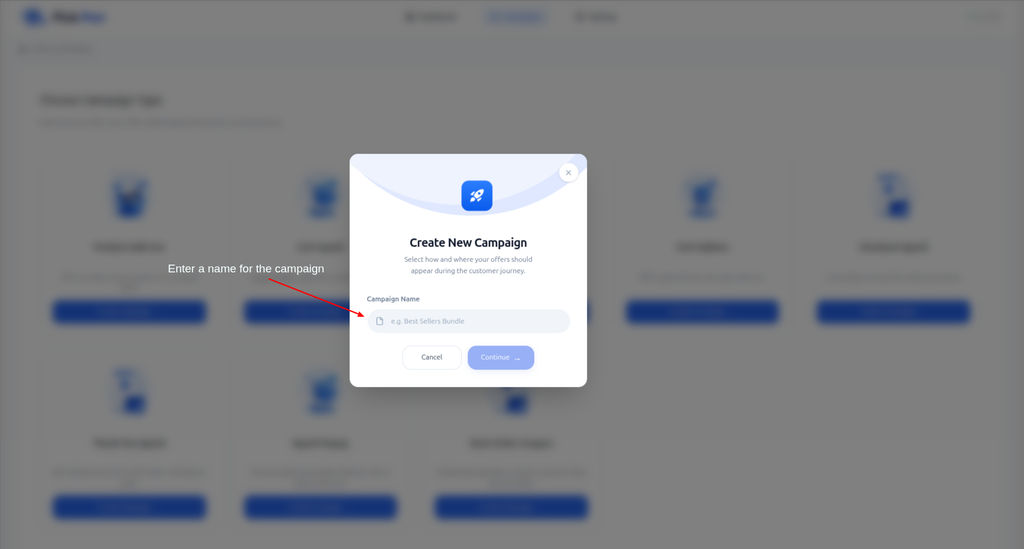
3. Name Your Campaign
- Enter a campaign name for internal reference.
Examples:- Next Order 10% Discount
- Customer Loyalty Coupon
- Post-Purchase Reward
- Click Continue.
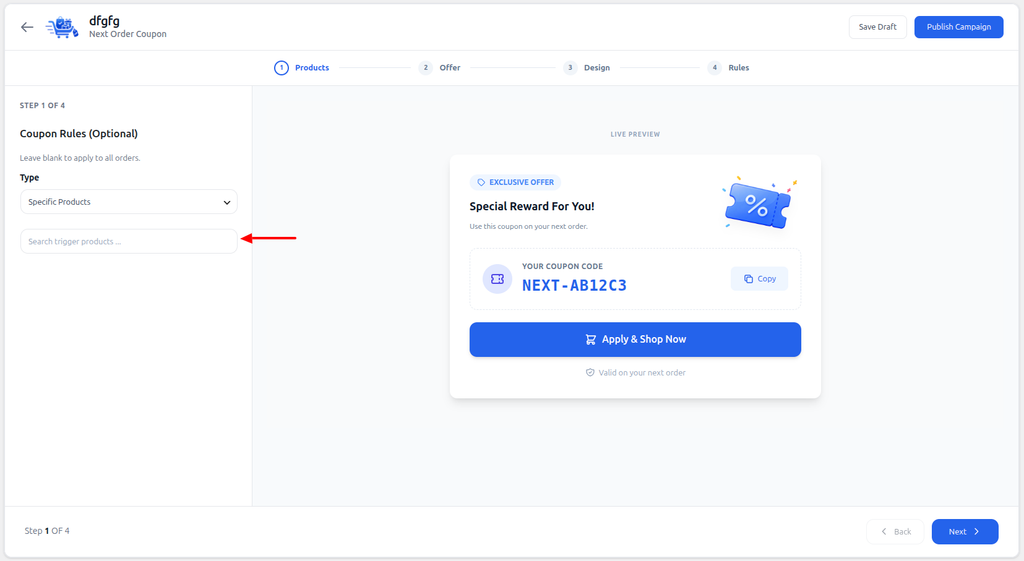
The editor includes four steps: Rules, Coupon, Design, and Order Rules.
4. Configure Coupon Rules
Coupon rules determine which orders qualify for the coupon.
- In Step 1: Rules, locate Coupon Rules (Optional).
- Under Type, choose:
- Any Order – applies the coupon to all orders.
- Specific Products – applies the coupon when selected products are purchased.
- Category Based – applies the coupon when products from selected categories are purchased.
- If you select Specific Products, search for and select the products.
- If you select Category Based, select the required product categories.
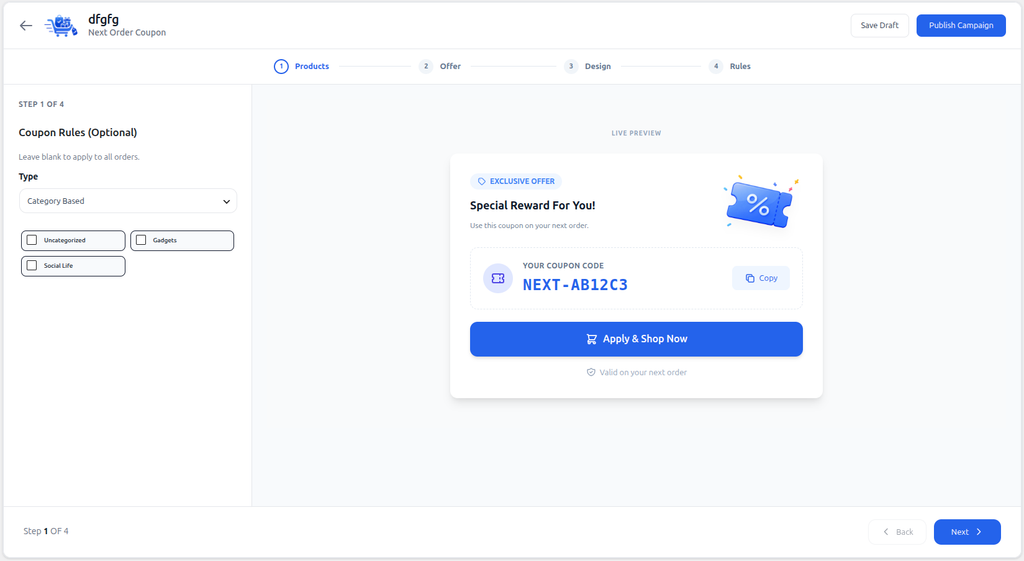
Leave the rules unchanged to apply the coupon to all orders.
5. Configure the Coupon
- Click next to go to Step 2: Coupon.
- Under Coupon Settings, enter a Coupon Prefix.
Example: NEXT- - Under Discount Type, choose:
- Percentage (%)
- Fixed Amount
- Enter the discount Value.
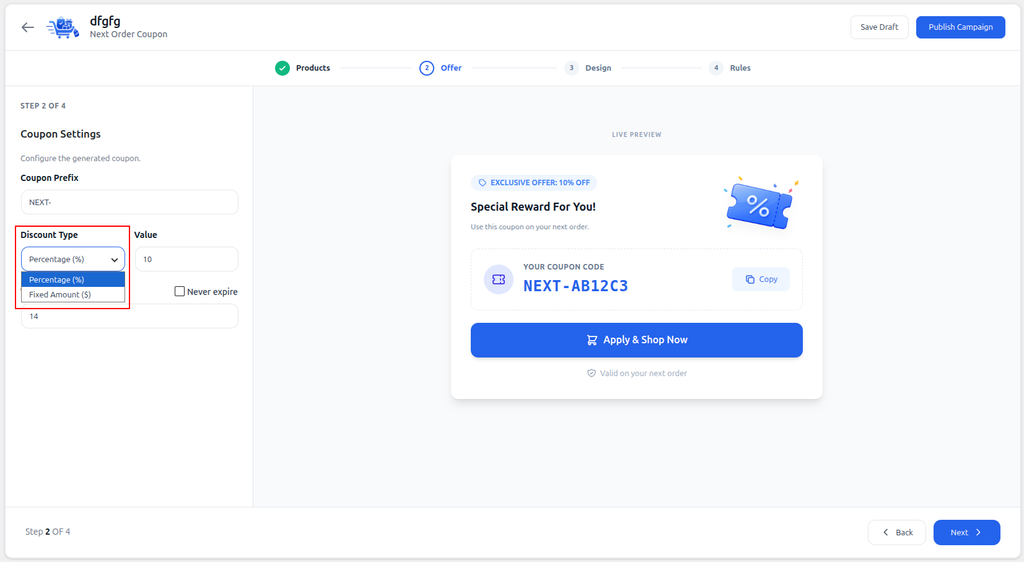
- Set the Validity (Days).
- Enable Never expire if the coupon should not expire.
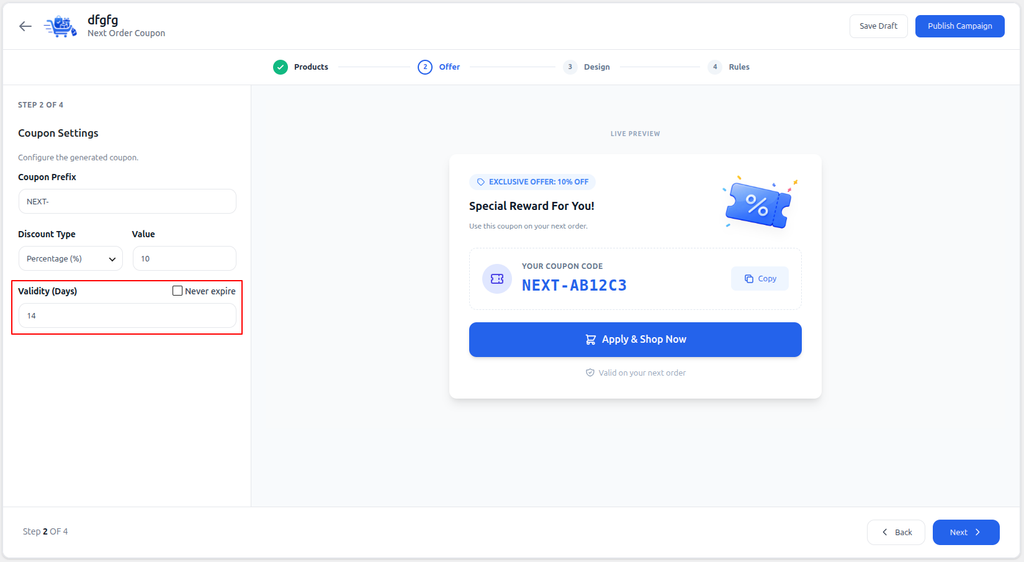
The coupon value must be greater than zero.
6. Customize the Design
- Click next to go to Step 3: Design.
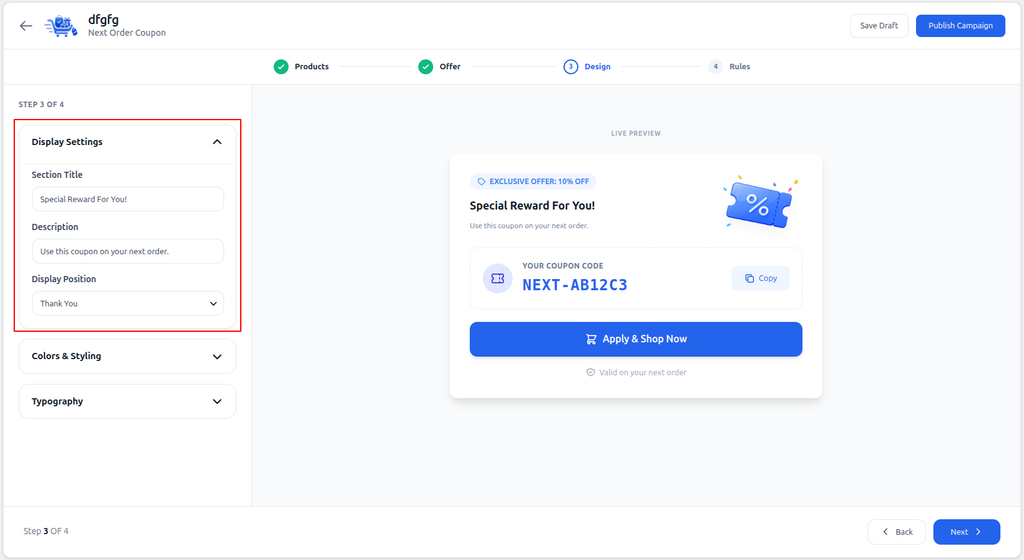
- Expand Display Settings.
- Enter the Section Title.
- Enter a short Description.
- Choose the Display Position:
- Before Thank You
- Thank You
- Before Order Table
- After Order Table
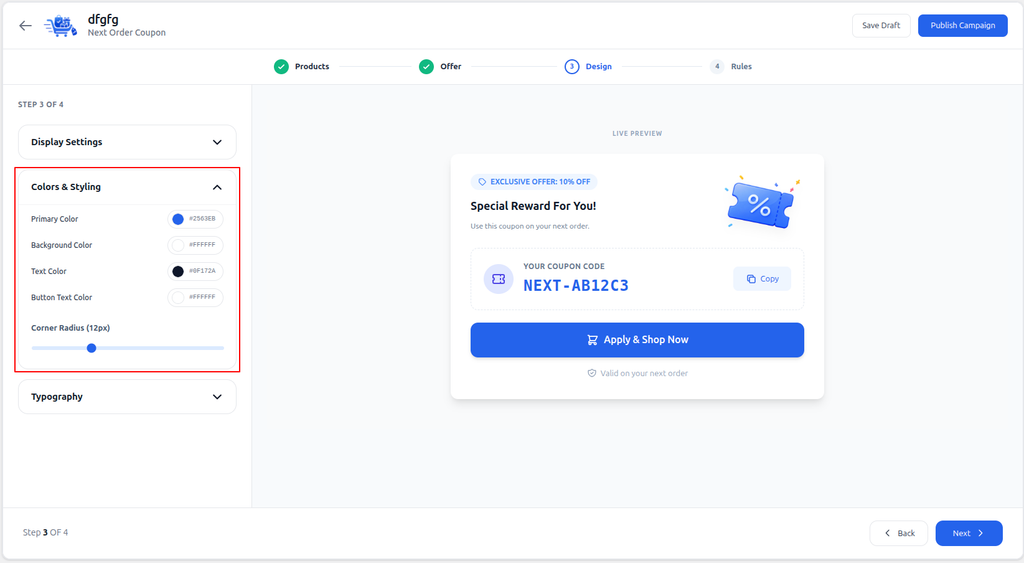
- Expand Colors & Styling to customize:
- Primary Color
- Background Color
- Text Color
- Button Text Color
- Corner Radius
- Expand Typography to adjust the heading and subheading sizes.
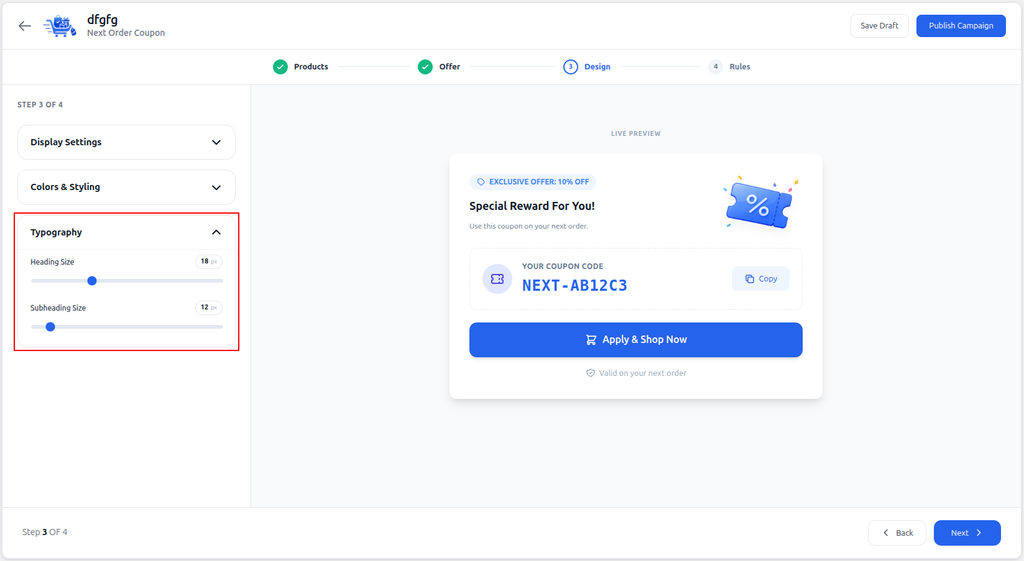
- Review the preview on the right-hand side.
7. Configure Order Rules
- Click next to go to Step 4: Order Rules.
- Enable First Order Only if the reward should be shown only after a customer’s first order.
- Under Customer Orders, choose:
- Everyone
- Returning Customer
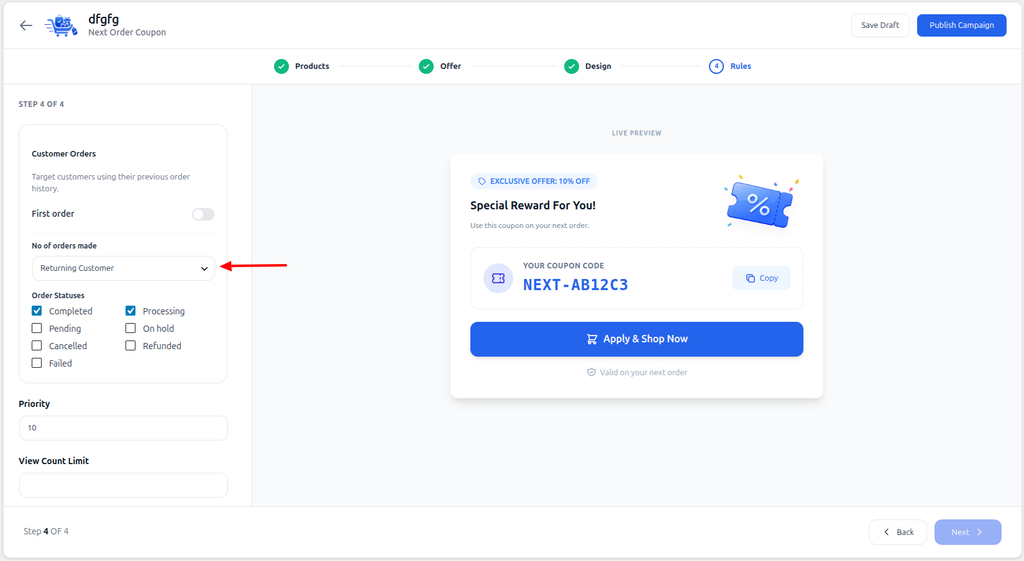
- Custom Order Count
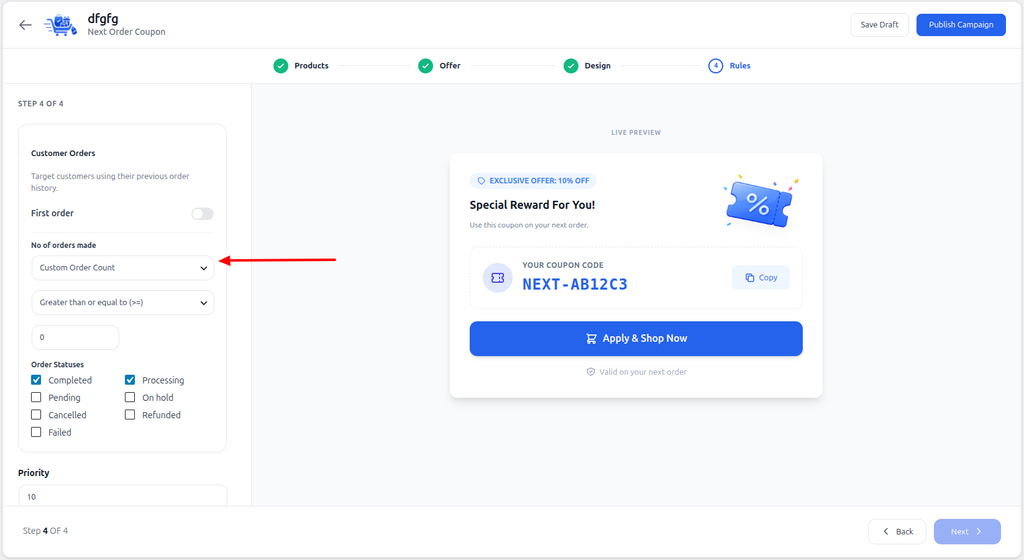
- For Custom Order Count, select an operator and enter the required number of orders.
- Select the order statuses that should be counted.
8. Configure Advanced Rules
- Set the Priority of the campaign.
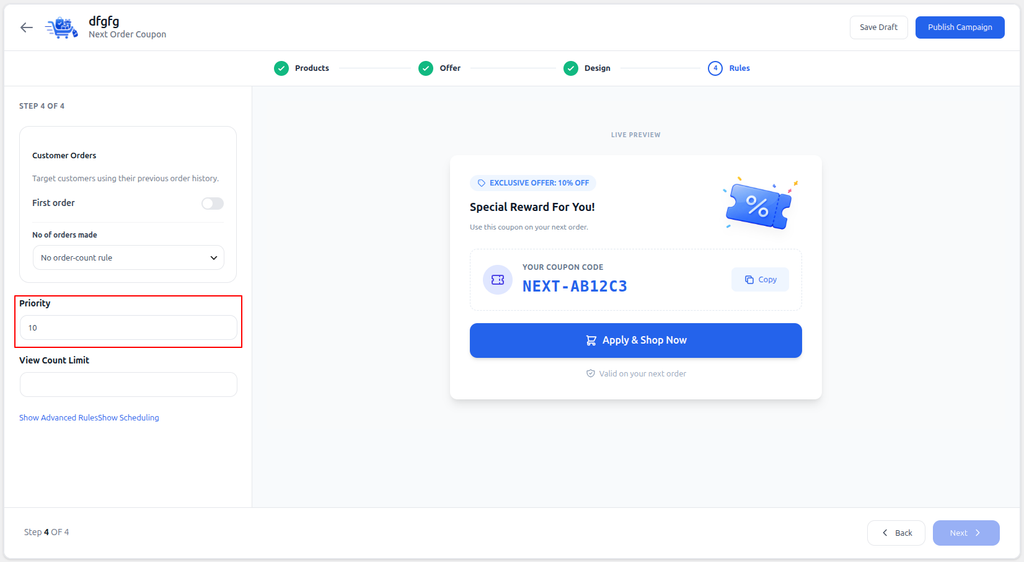
- Enter a View Count Limit if required.
- Click Show Advanced Rules to configure:
- Min order total
- User roles
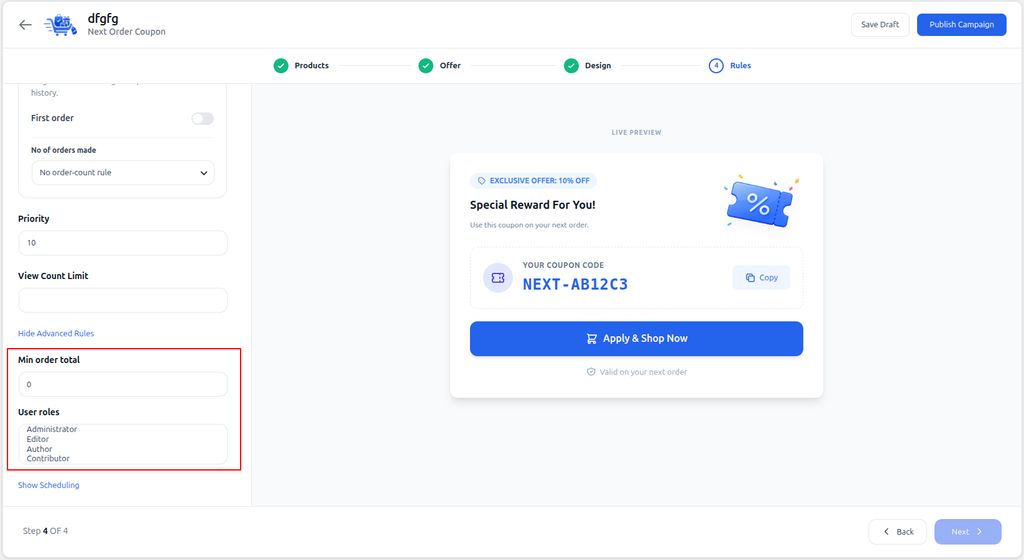
Leave these settings empty if the coupon should be available to all qualifying customers.
9. Schedule the Campaign
- Click Show Scheduling if the campaign should run during a specific period.
- Set the Start date.
- Set the End date.
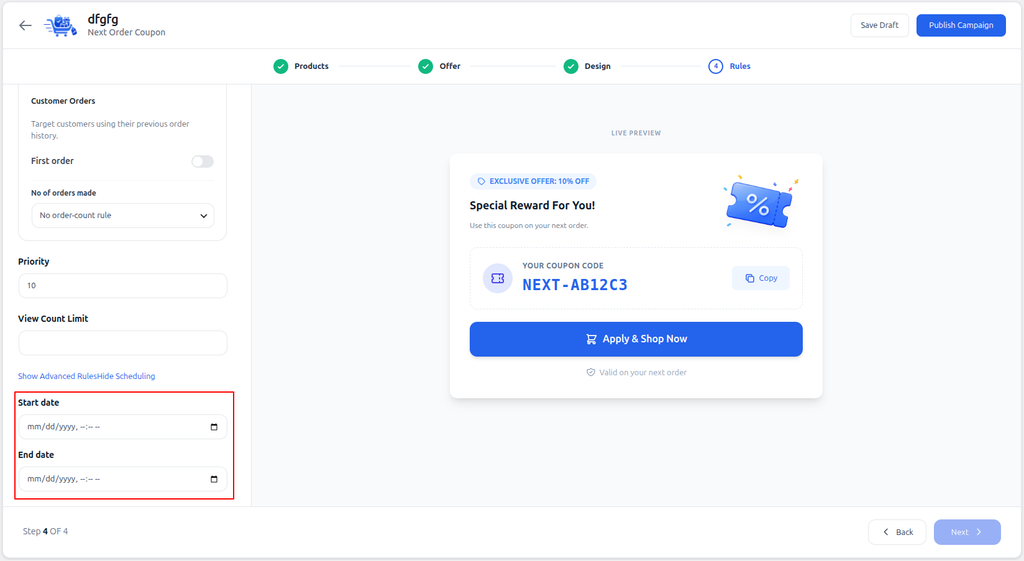
Leave Scheduling disabled if the campaign should run continuously.
10. Publish the Campaign
- Review all settings and the preview.
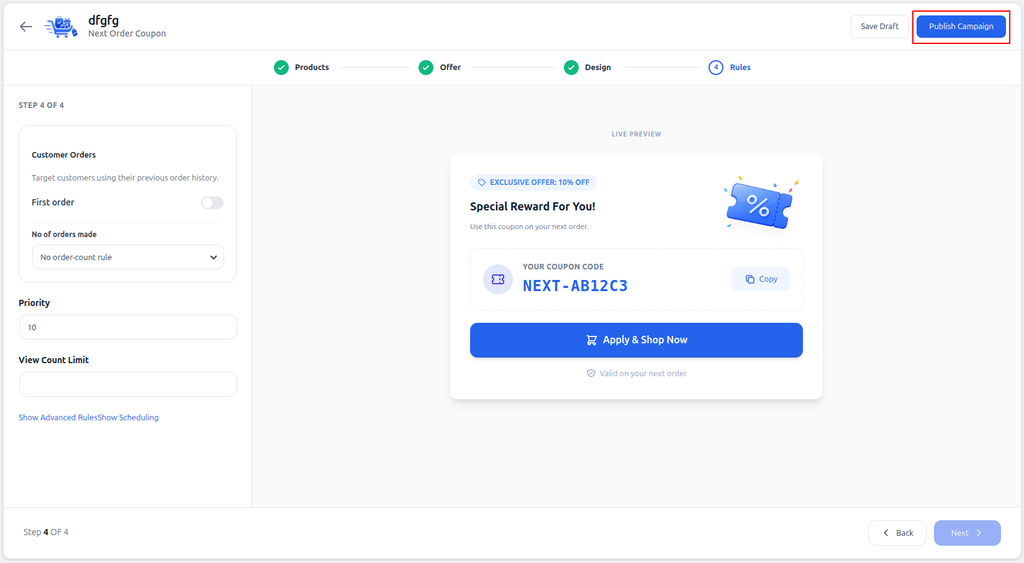
- Click Save Draft to save the campaign without activating it.
- Click Publish Campaign to make the campaign live.
11. Test the Campaign
- Place a qualifying test order.
- Open the order confirmation or thank-you page.
- Confirm that the reward message is displayed.
- Check the coupon prefix, discount value, and expiry date.
- Copy the generated coupon code.
- Place a new test order.
- Apply the coupon and confirm that the discount works correctly.
- Test the campaign with a non-qualifying order.
- Confirm that the coupon is not generated when the campaign rules are not met.