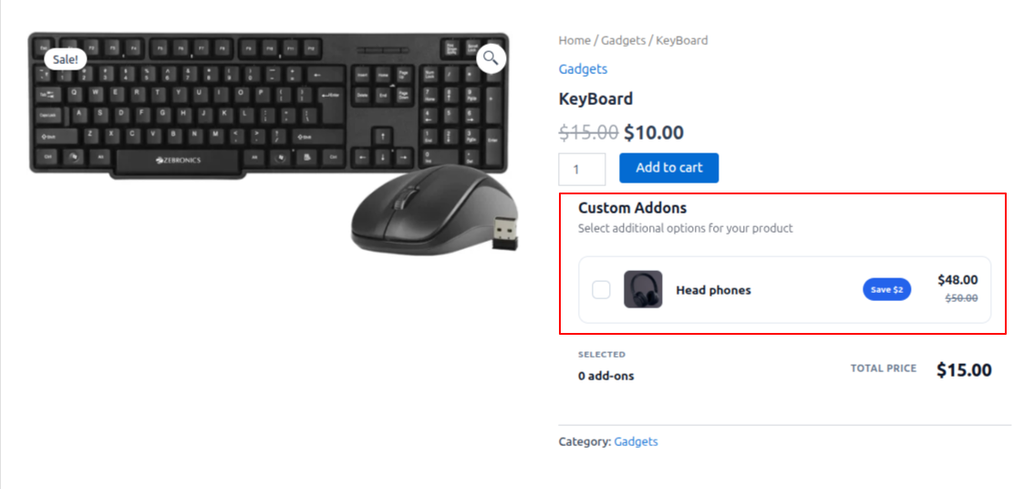
Product Add-ons allows you to offer complementary products—such as warranties, gift wrapping, accessories, or protection—directly on a WooCommerce product page.
Product Add-ons are available with PickPair Pro.
1. Open the PickPair Plugin
- Log in to your WordPress Dashboard.
- Click PickPair in the left-hand menu.
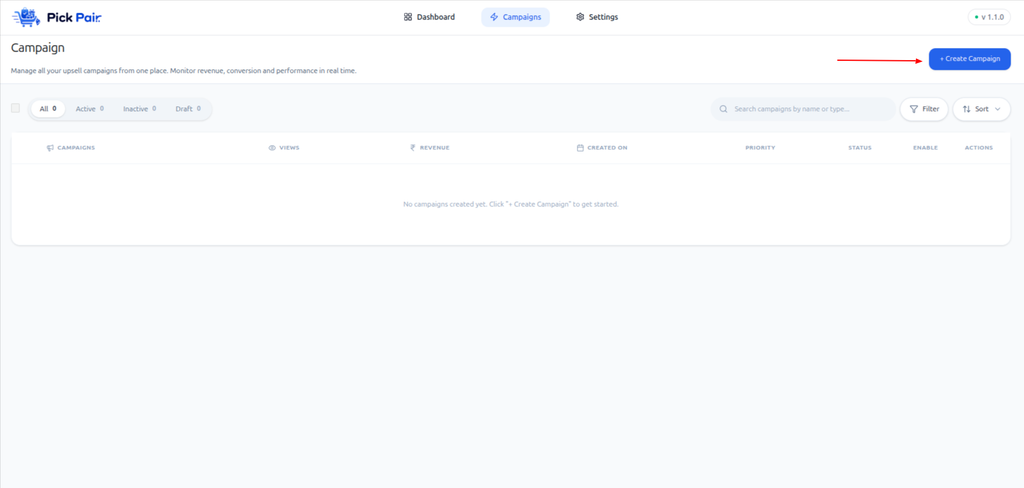
- Open Campaigns.
- Click + Create Campaign.
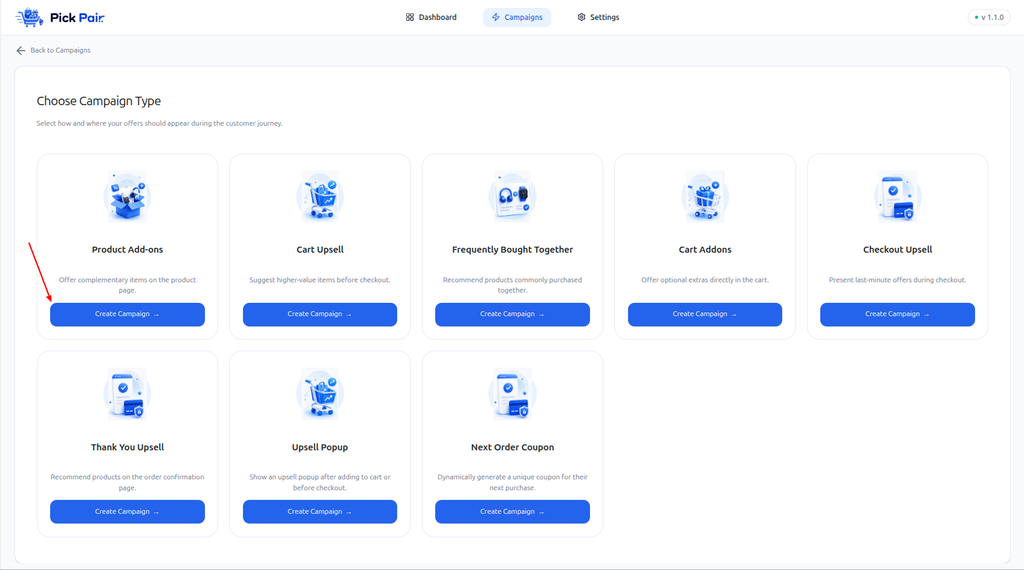
2. Choose the Campaign Type
- Select Product Add-ons.
- Click Create Campaign.
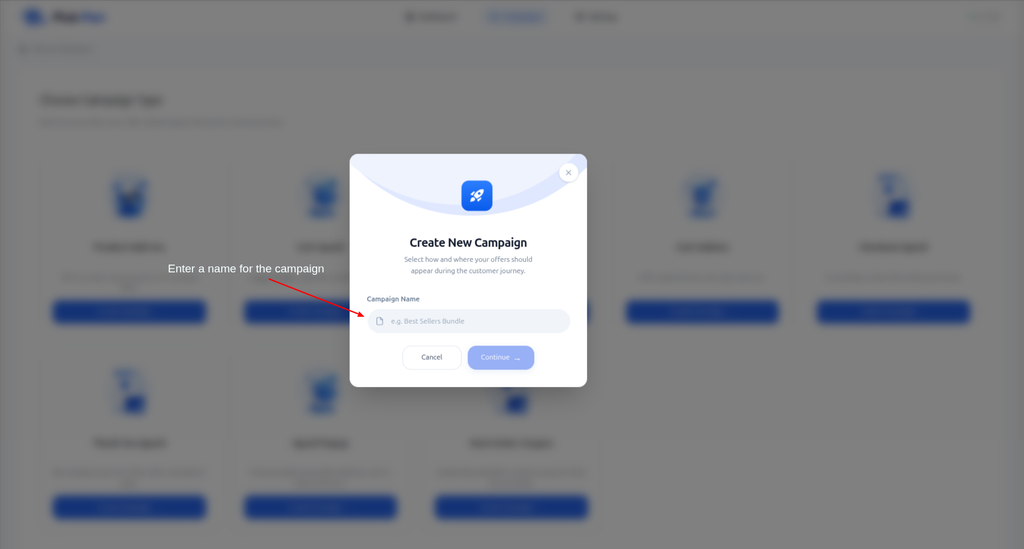
3. Name Your Campaign
- Enter a campaign name for internal reference.
Examples:
- Laptop Warranty Add-on
- Gift Wrapping Offer
- Camera Accessories
- Click Continue.
The editor includes four steps: Products, Offer, Design, and Rules.
4. Select Trigger Products
Trigger products determine where the add-on offer will appear.
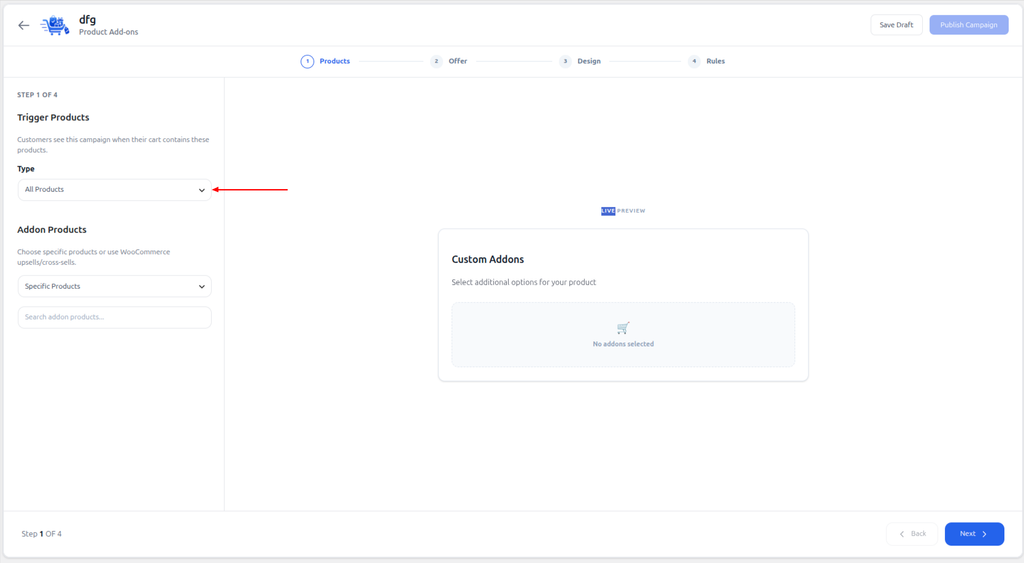
- In Step 1: Products, locate Trigger Products.
- Under Type, choose:
- All Products (default) – displays the campaign on every product page.
- Specific Products – displays the campaign only on selected products.
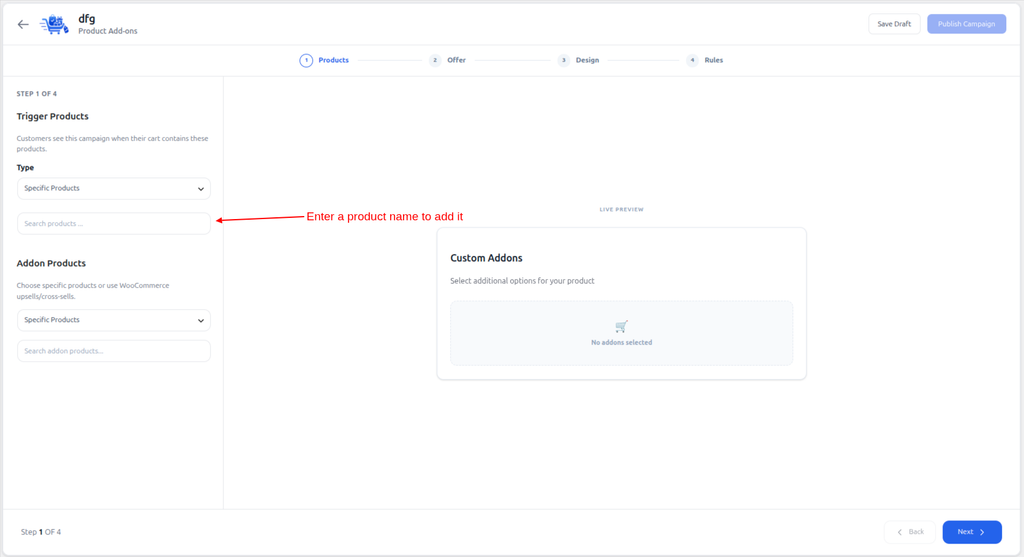
- If you select Specific Products, search for and choose the products where the campaign should appear.
5. Select Add-on Products
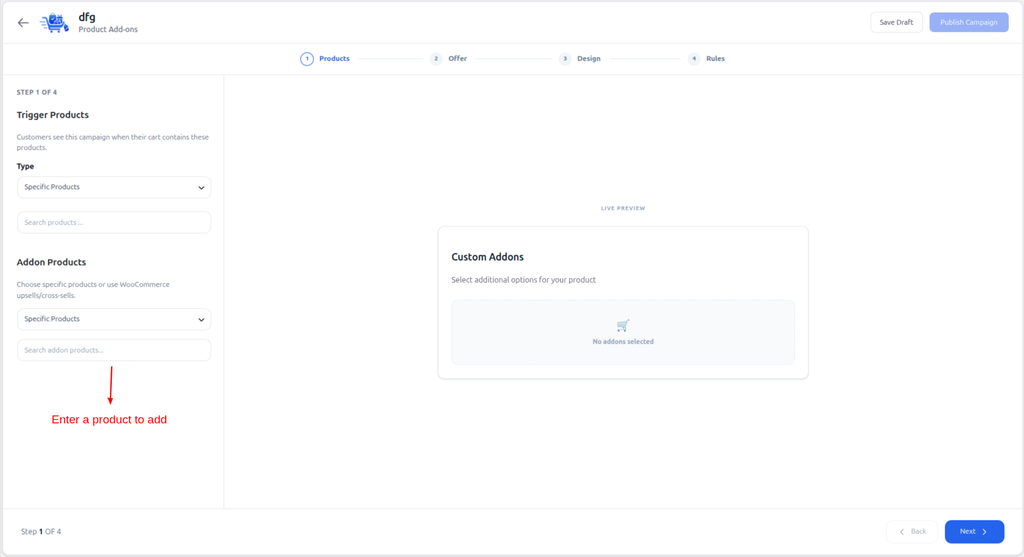
Under Addon Products, choose how PickPair should find the products to offer:
- Specific Products – manually select add-on products.
- Product Upsells – use the upsell products configured in WooCommerce.
- Product Cross-sells – use the cross-sell products configured in WooCommerce.
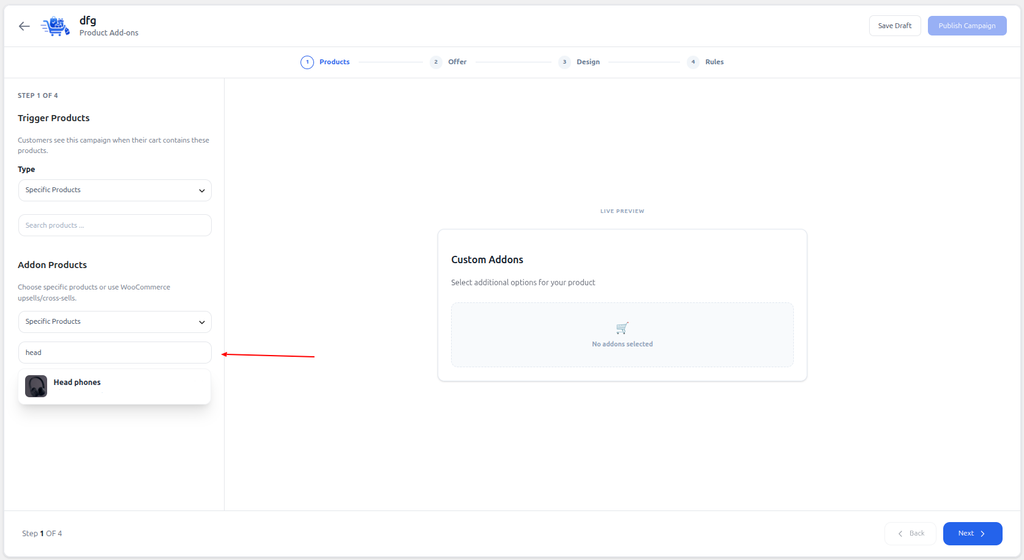
If you choose Specific Products:
- Search for and select one or more products.
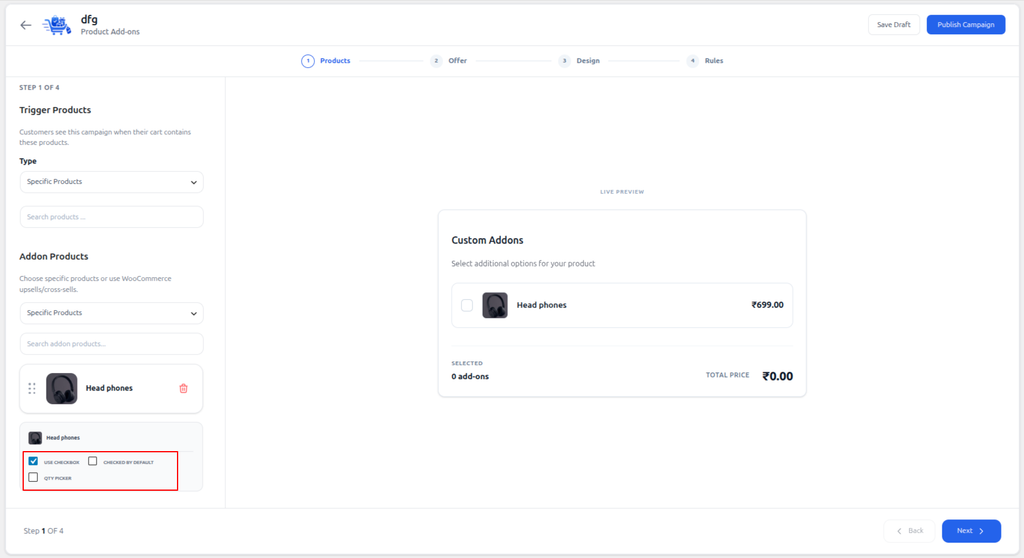
- Configure each add-on as needed:
- Use checkbox – customers must check the box to add the product.
- Checked by default – preselects the add-on for customers.
- Qty Picker – allows customers to select the quantity.
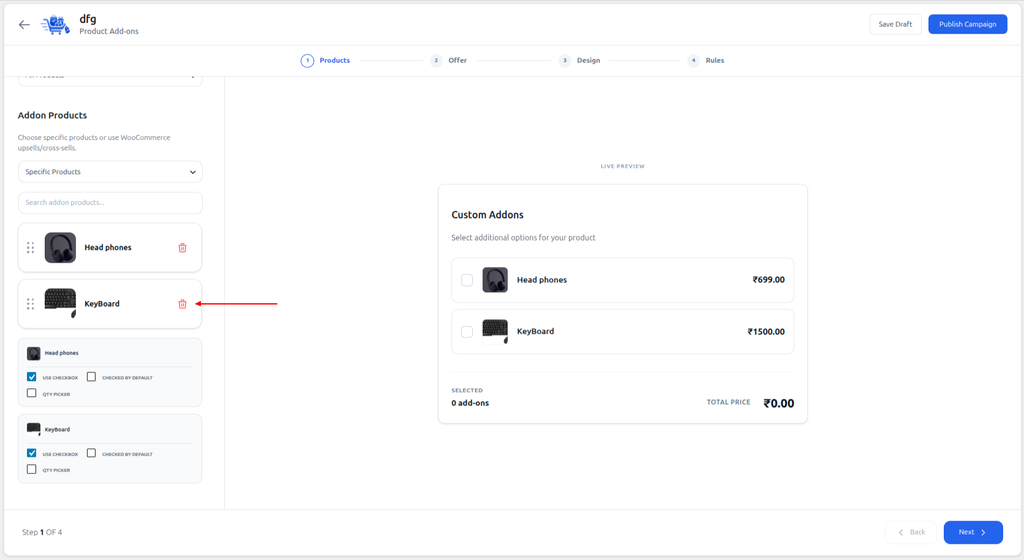
- Click Trash Icon to delete an unwanted add-on.
The main product is automatically excluded if it is selected as its own add-on.
6. Configure the Offer
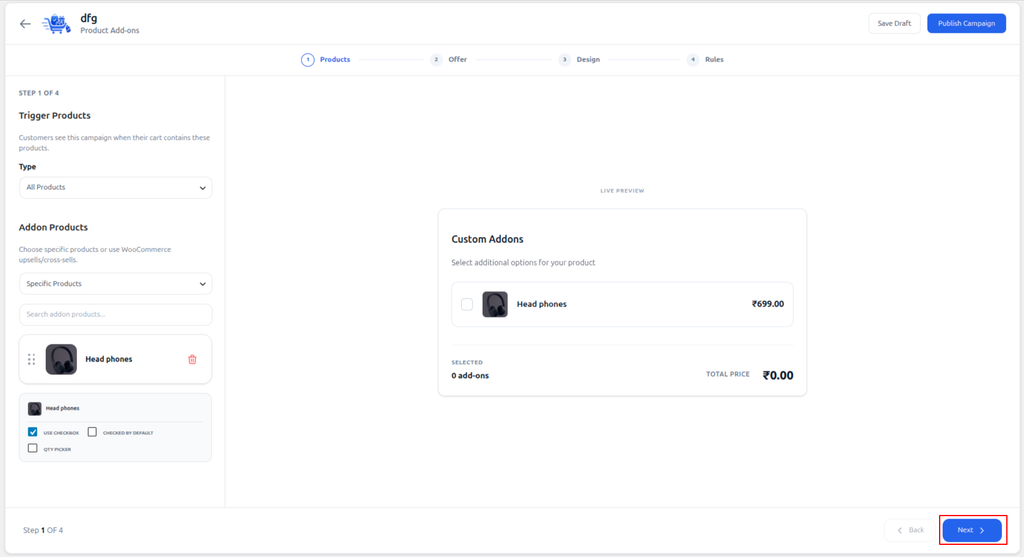
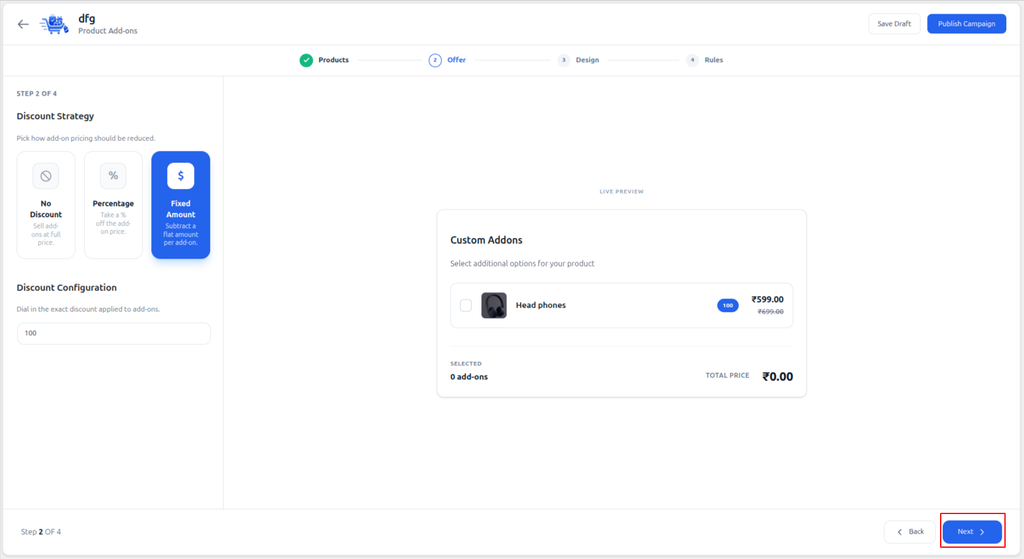
- Click next to go to Step 2: Offer.
- Under Discount Strategy, choose:
- No Discount – sells the add-on at its regular price.
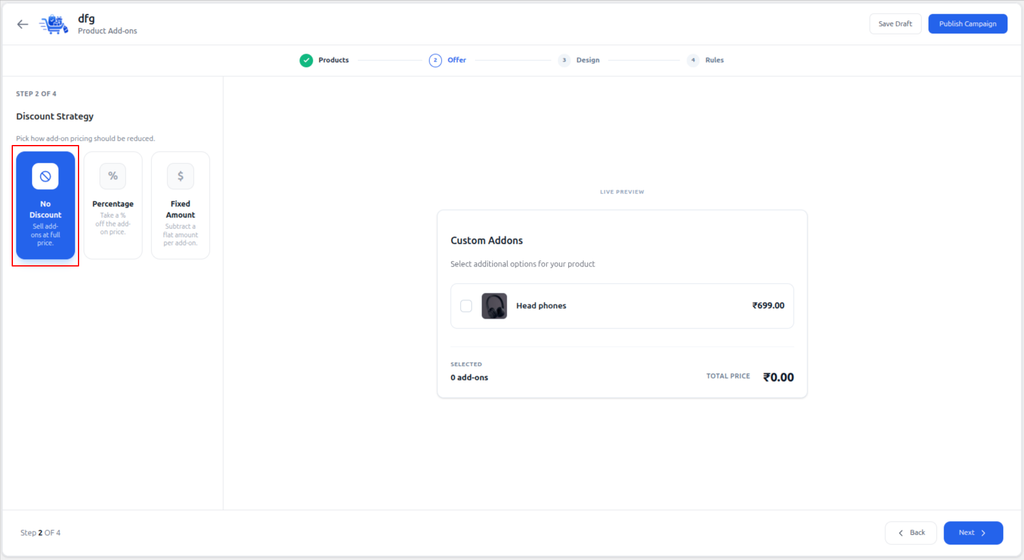
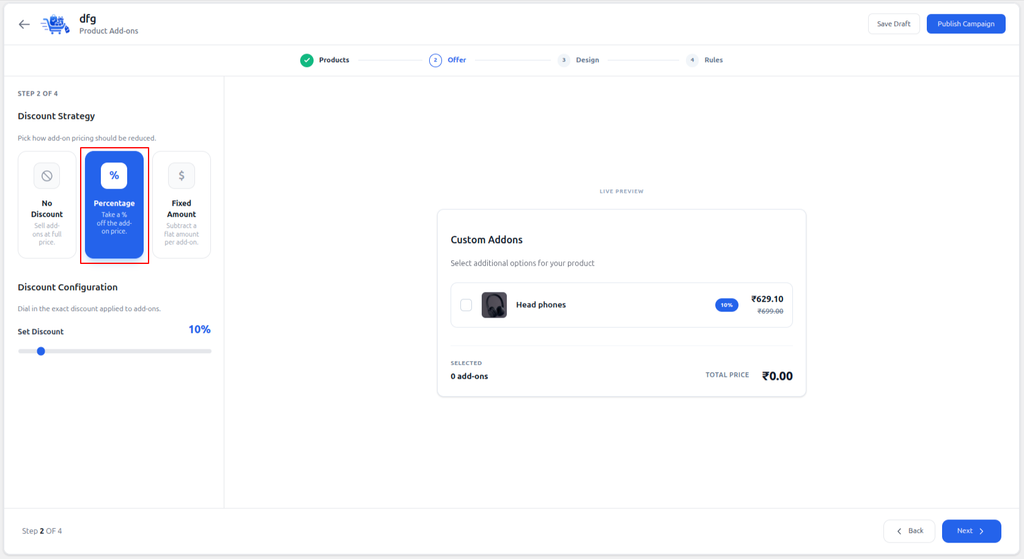
- Percentage – applies a percentage discount, such as 10%.
- Fixed Amount – subtracts a fixed amount from the add-on price.
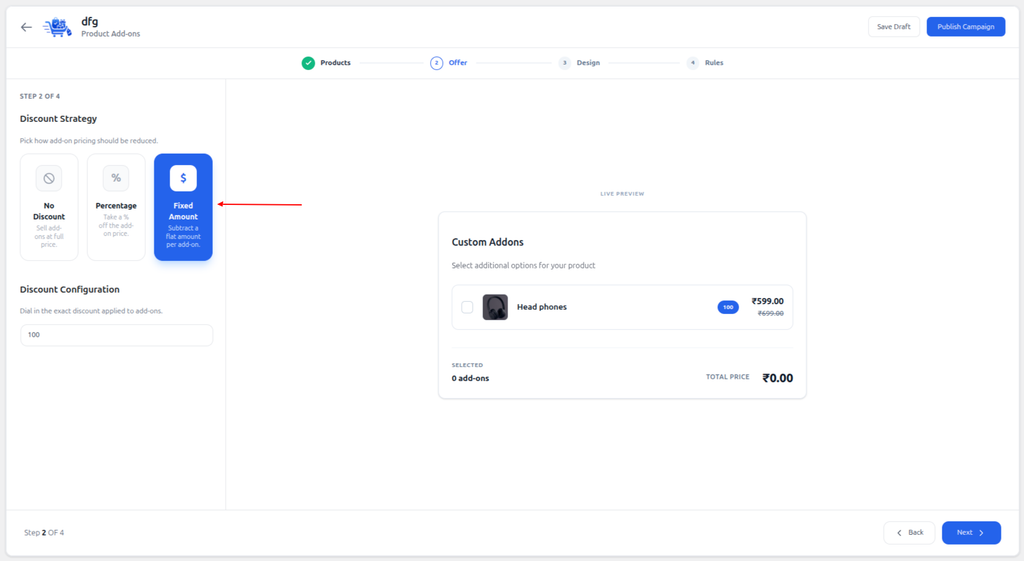
- Enter or select the discount amount.
- Review the updated pricing in the preview.
7. Customize the Design
- Click next to go to Step 3: Design.
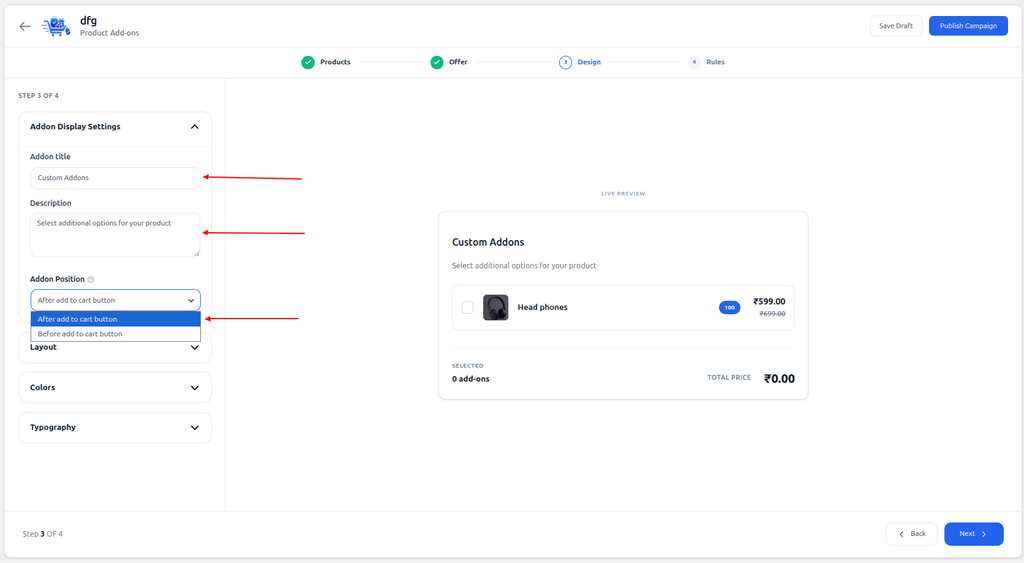
- Expand Addon Display Settings.
- Enter the customer-facing Addon title.
- Enter a short Description.
- Choose the display position:
- Before add to cart button
- After add to cart button
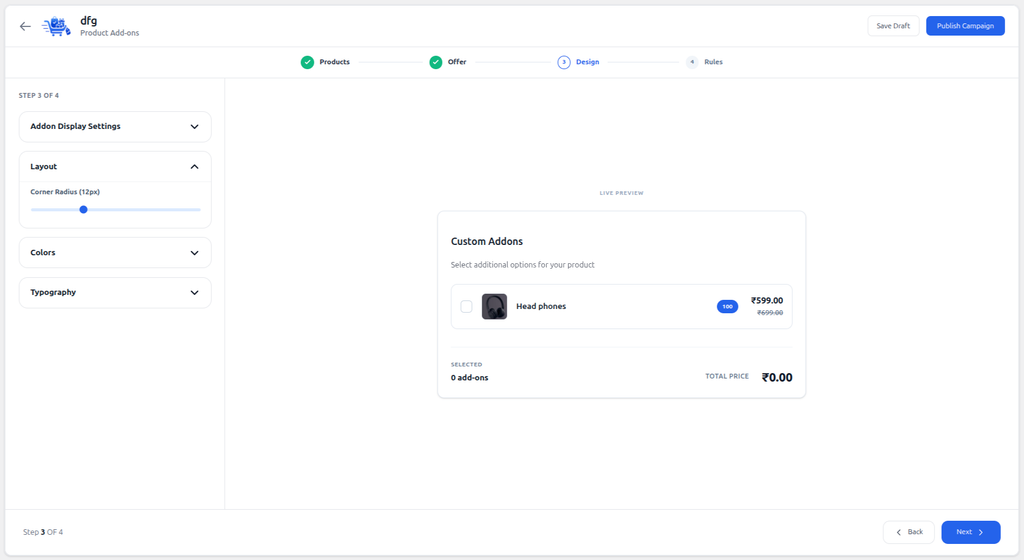
- Expand Layout to adjust the corner radius.
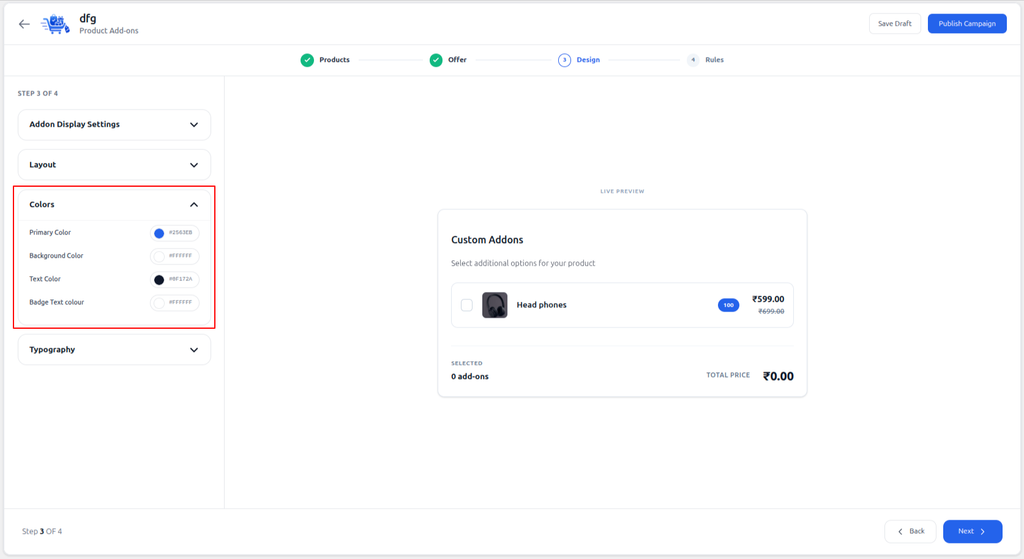
- Expand Colors to customize the primary, background, text, and badge colors.
- Expand Typography to adjust the heading, subheading, and font sizes.
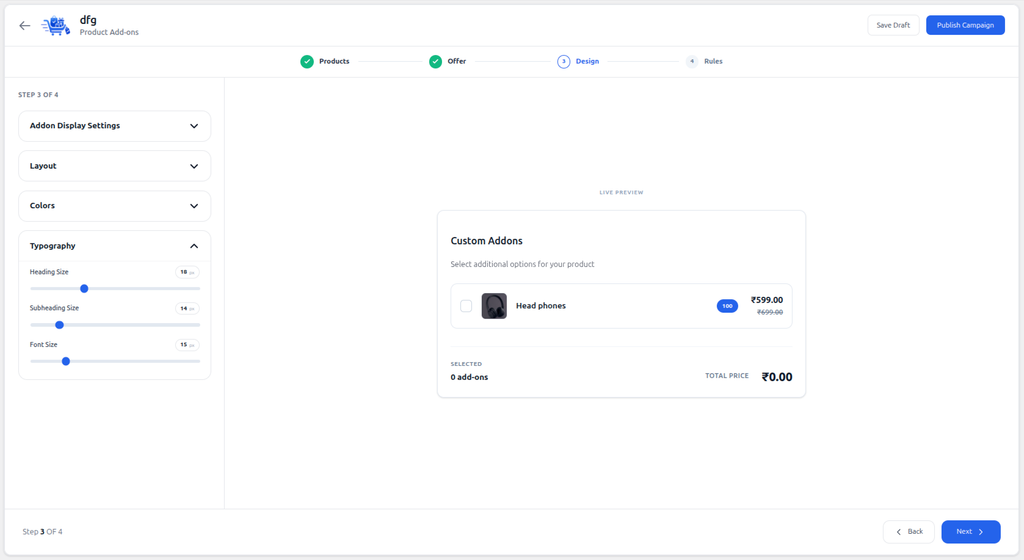
- Review the preview on the right-hand side.
8. Configure Visibility Rules
- Click next to go to Step 4: Rules.
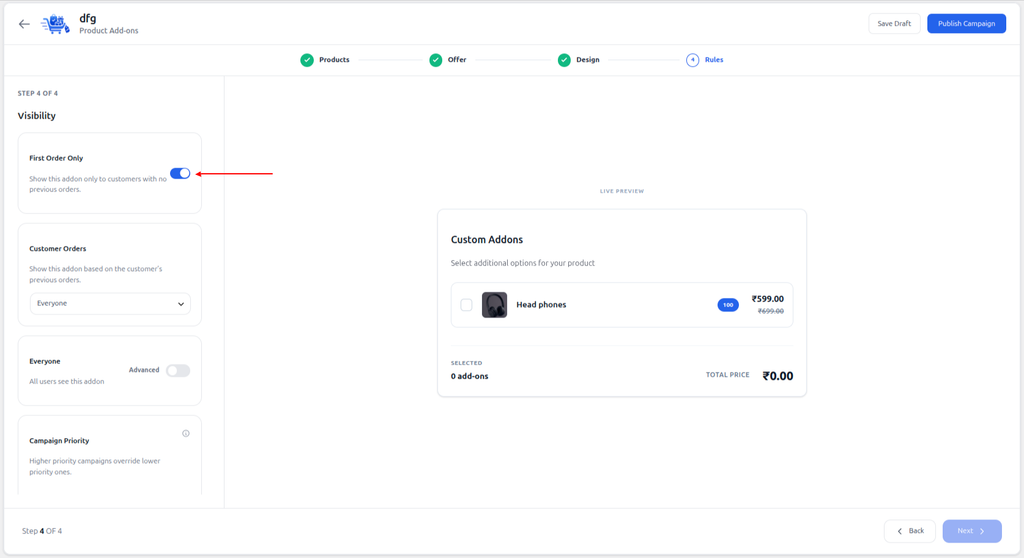
- Enable First Order Only if the campaign should be shown only to customers placing their first order.
- Under Customer Orders, choose:
- Everyone
- Returning Customer
- Custom Order Count
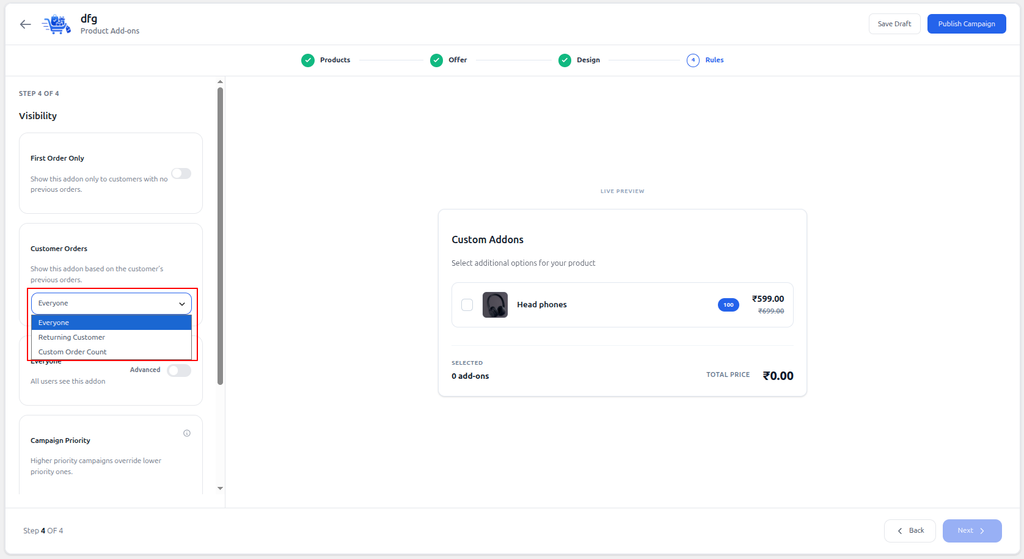
- For Custom Order Count, choose an operator and enter the required number of orders.
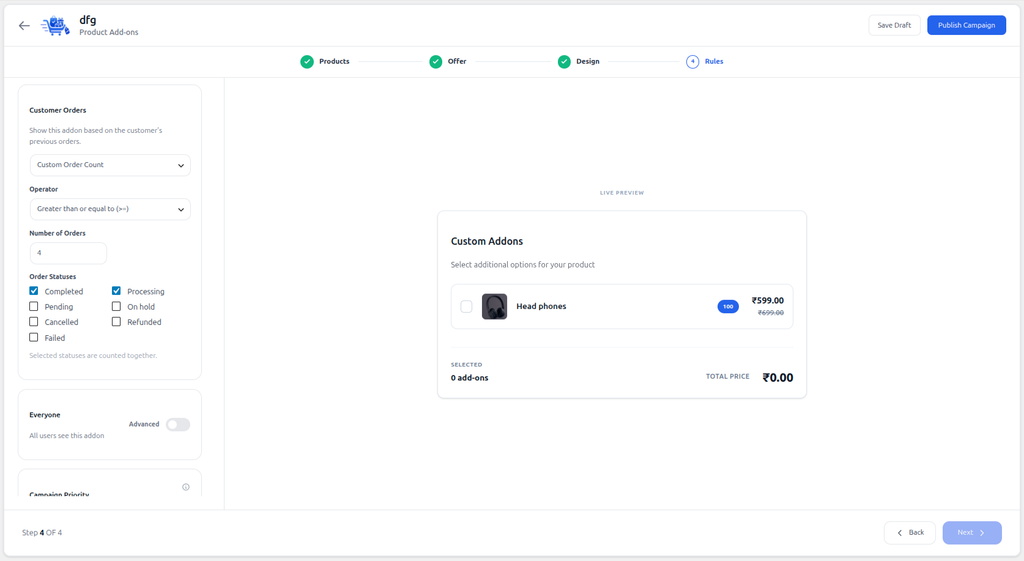
- Select the order statuses that should be counted.
First-order and order-count rules require PickPair Pro.
9. Configure Advanced Visibility
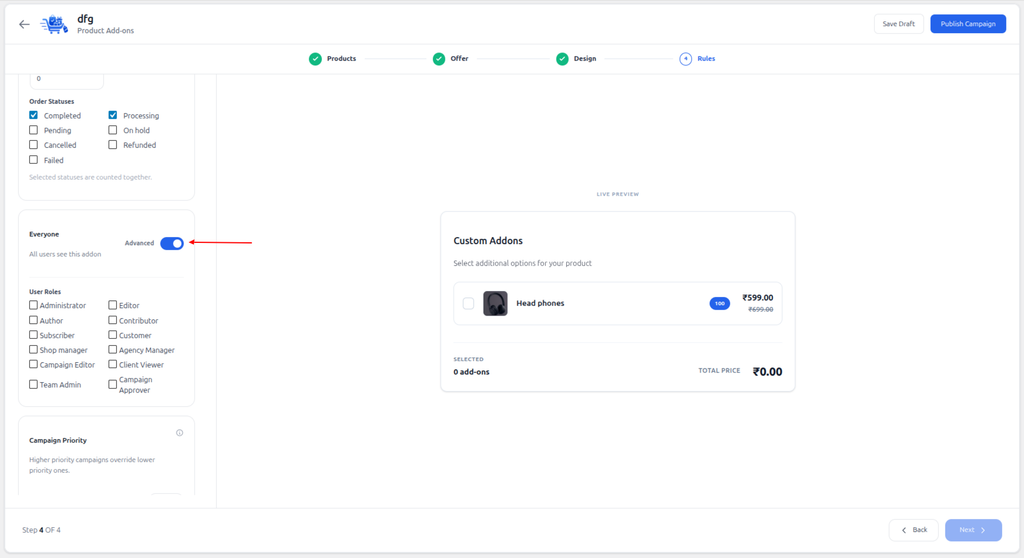
- Enable Advanced under the Everyone section.
- Select the WordPress user roles that should see the campaign.
- Leave all roles unselected to show the campaign to everyone.
10. Set Campaign Priority
- Adjust the Campaign Priority slider or number field.
- Use a higher value if this campaign should take priority over other matching campaigns.
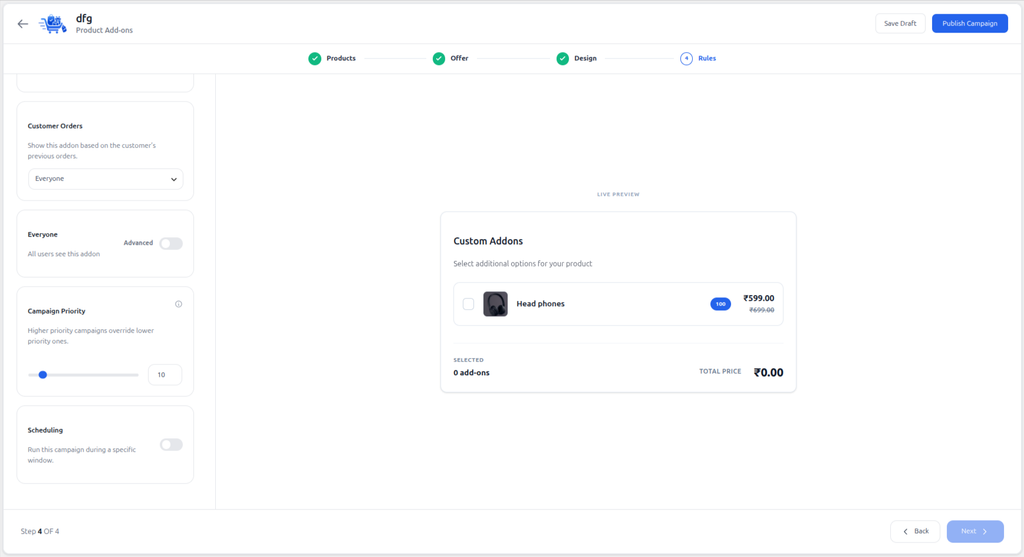
11. Schedule the Campaign
- Enable Scheduling if the campaign should run during a specific period.
- Set the Start Date & Time.
- Set the End Date & Time.
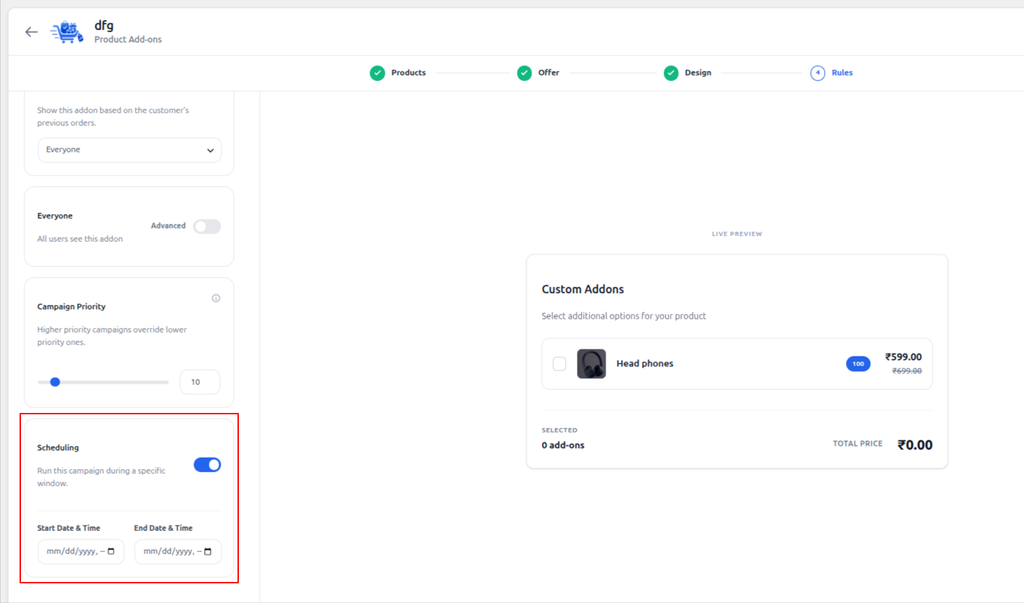
Leave Scheduling disabled if the campaign should run continuously.
12. Publish the Campaign
- Review all settings and the preview.
- Click Save Draft to save the campaign without activating it.
- Click Publish Campaign to make the campaign live.
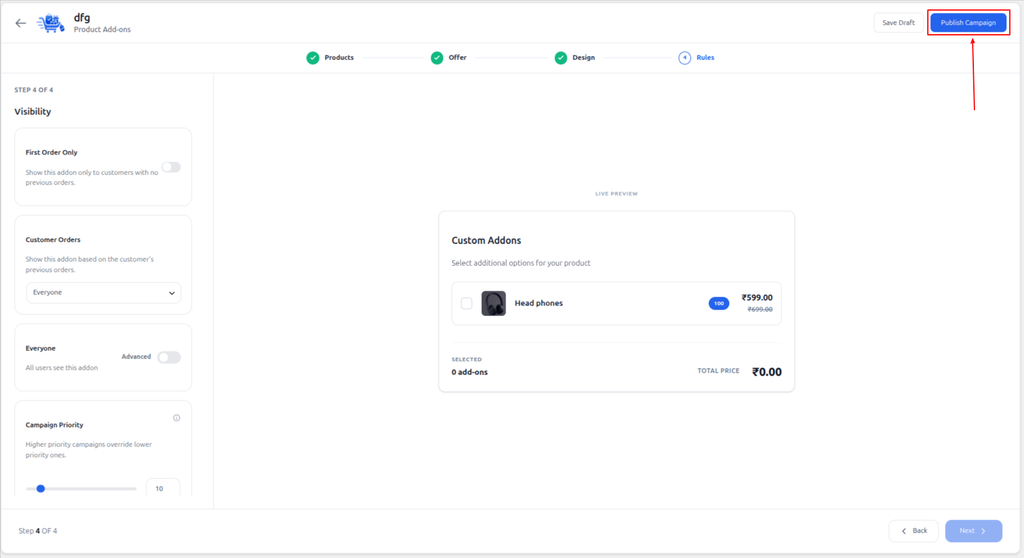
If Specific Products is selected under Addon Products, at least one add-on product must be selected before publishing.
13. Test the Campaign
- Open a product page that matches the trigger settings.
- Confirm that the add-on section appears in the correct position.
- Check the title, description, images, prices, and discount.
- Select and deselect an add-on.
- Test the default selection and quantity picker, if enabled.
- Add the main product to the cart.
- Confirm that the selected add-on appears as a separate cart item.
- Verify that the correct discount is applied.
- Remove the main product and confirm that its linked add-on is also removed.